| FCIT Home > A Teacher's Guide to School Web Sites > Chapter 4: Design |

When you have answered the basic questions about the purpose and goals of your site, you are ready to begin the Design Phase.
- Organize Your Content
- Determine Site Structure
- Set Up your Navigation
- Choose the Look And Feel
- Design Your Pages
Organize Your Content
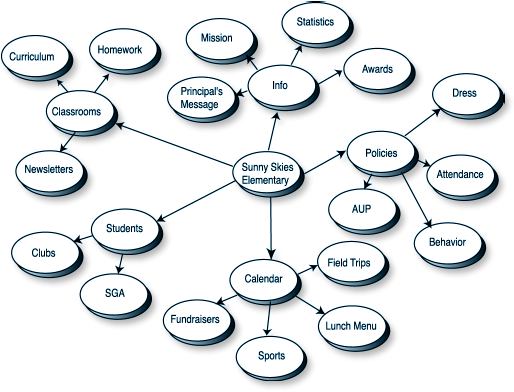
After brainstorming the kinds of elements you want on the web site, you must organize them into categories or logical groupings of information. There are several ways to accomplish this:
- Cards on the floor. Write each element on a piece of paper or index card. Then move the cards around until you have created categories.
- White board with colored markers. If you have a large white board available, you can use colored markers to set up categories and group elements using different colors.
- Concept mapping software. You can also organize elements using concept mapping software such as Inspiration. The software will allow you to easily move elements around on the screen as you brainstorm and experiment with various arrangements of site content.
Determine the Site Structure
Next, create a site
structure that includes all of the elements grouped in a logical way so
that users can easily find information. During this process you will be
analyzing, sifting, grouping, and linking similar content in order to
create a flowchart of your site.
As you design your flowchart, keep in mind your initial decisions regarding
the users of the site. What will the audience be looking for? Which elements
should go on the home page, and which major categories need to be accessible
from the home page? It may be helpful to create some user profiles. If
you were a prospective parent, what information would you be looking for
and what would be a logical grouping of that information? Use the profiles
later in the evaluation process to check whether or not you have accomplished
your goals.
Creating a flowchart can be done in several ways similar to brainstorming:
note cards, concept mapping software, white boards, or butcher paper.
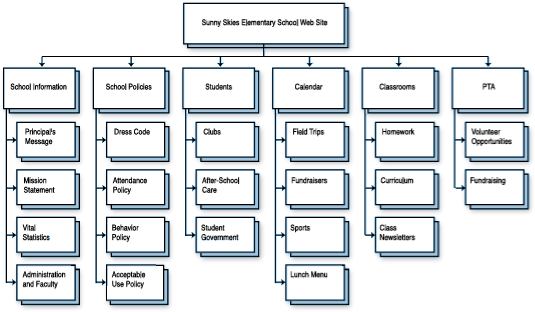
When you look at other school web sites you will see the different ways
information can be organized. Try to develop an organizational scheme
that works for the goals of your school site, as determined in your initial
decision phase. Although there are several ways of structuring a web site,
most sites will follow a hierarchical scheme such as the one below.
Set Up Your Navigation
You can help to avoid frustration on the part of your users by putting thought and good design principles into effect in your navigation interface. The navigational structure is the means by which the user moves through the site. Examples of navigation aids you may want to consider are breadcrumbs, tabs, and sidebar menus.
- Breadcrumbs. Breadcrumbs are a series of keywords that progressively
link broad categories to more specific ones. If users want to move up
several categories, all they have to do is click on the keyword they
want. Example:
Home > Students > Clubs > Chess - Tabs. Some sites use tabs that look like the tabs on a file folder to identify major sections of the site. Typically, a tabbed interface indicates parallel categories, such as six different grade levels.
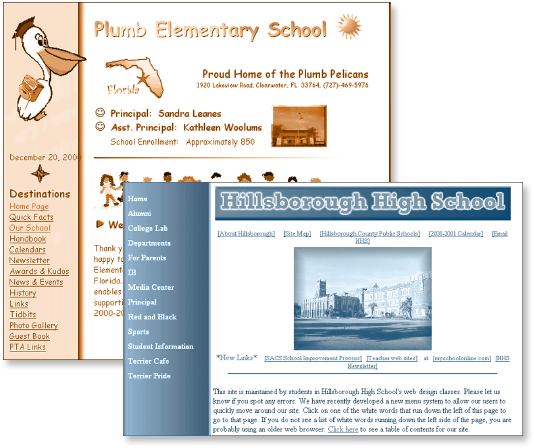
- Sidebar menus. Sidebar menus are usually placed on the left of the screen and have a listing of the site topics. Such menus are popular because they are easy to use and can be as detailed as necessary. See the Plumb Elementary School example below.
- Avoid orphan pages, which have no links back to other places in the site.
- Place the navigation in a consistent place on each page so the user does not become confused.
- Have others evaluate your proposed navigational interface during the development process.
Choose the Look and Feel
The look and feel is determined by the overall image of your site. The type of graphics, fonts, layout, and colors all contribute to what is called the look and feel. You may decide that the look and feel needs to be different for parental areas than for student areas. Also, think about how you want to portray your school to prospective parents and students. Faculty at a preschool most likely will want an entirely different look and feel than teachers and students at a high school. One school may want to emphasize how much fun learning can be, while the other may want to portray the importance of high academic standards. If the committee members have done the preparatory research, they will have other sites to use as a frame of reference for what they like and what might work for their school.
Design Your Pages
After you arrive at an overall site structure and decide on a look and
feel, you are ready to lay out your individual pages. First, determine
what information will go on each page, according to the structure you
have developed. Second, draw a rough layout of each page identifying the
text and graphics that will be included.
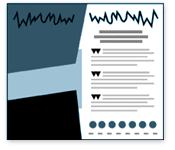
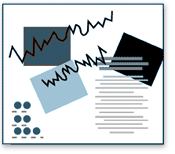
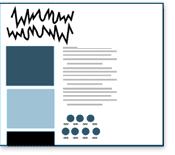
Thumbnail sketches help you to visualize your finished page. The first
example below exemplifies good use of basic design principles: balance,
unity, simplicity, and emphasis. The second and third sketches show, respectively,
poor balance and unity in web page design.
- Homepage. The home page creates a first impression and sets the tone for the rest of the site. It is very important for it to load quickly or you may lose potential viewers. Many home pages have a simple layout: a welcome page, with a picture of the school, the name of the school, address and phone and perhaps a mascot, along with the navigational interface. Because a user may enter your site without going through the home page, all pages on your site should have identifying information and a link to the home page.
- Banner. You may want to place a banner at the top of each page containing the name of the school and a logo or picture that links back to your home page. If a user arrives at your site without coming through the home page, the banner will identify your site and the visitor can easily navigate back to your home page.
- Background. The background of your pages should be consistent throughout your site. Choose a background that provides good contrast to your text and graphics. The background should not be so busy that attention is drawn away from your message. Many sites use a texture for a background that gives a little visual depth, instead of a plain color. The background should remain visually where it is supposed to be—in the back!
- White space. You may not think of white space as a design element in your page, but it is. If you don’t leave enough white space (or whatever your background color may be) around the elements in your page, the page will feel crowded.
- Focus. Visual focus is provided on each page either intentionally or unintentionally by how you arrange the elements and how they are treated. When you add color, size, highlight, and/or movement to an element, you are saying, “Look at me!” Bright, warm colors such as yellow and red tend to draw attention. Relative to the rest of the page, the largest elements are assumed to be the most important and will attract attention first. Also, a viewer typically gives importance to those things that are on the left or middle of the page. Use movement sparingly on the screen and only when it has a purpose. Repetitious movement can be annoying and distracting when someone is trying to read the screen and a certain element keeps jumping or moving across the screen.
- Organization of text. Most readers scan a web page, rather
than reading word for word. Visual clues such as headings and subheadings,
bulleted or numbered lists, or text style help readers to locate information
quickly on the page.
Keep one theme for each page, providing links to other related information. Avoid long pages with lots of scrolling text, especially on pages for children. You may want to add text links to your pages. Any word or phrase can be linked to other pages on the Web. Linked text appears as a different color, typically blue.
- Visual format. Think about alternative ways of presenting the information you want to convey. Content can be presented using graphics, text, a movie or animation. For instance, a calendar format is more effective than a listing of events, because it helps people place the event on a day of the week in relation to other things in the month. Instead of giving people driving directions, provide a map.

Next
College of Education, University of South Florida
4202 E. Fowler Ave., EDU162
Tampa, Florida 33620