The ClipArt ETC website has over 70,000 line art images for teachers and students. There’s a lot of great black-and-white content there, but sometimes we want to add color to an image. In this post, you’ll learn one simple coloring technique that will change the process from frustrating to fast.
The Frustrating Way
Most people trying to colorize a black-and-white image try to fill white areas with a paint bucket tool. That will inevitably take many, many clicks and will leave nasty white pixels along edges. The more dedicated folks may try to draw color in with a brush or pencil tool. That will pretty much take forever and probably result in accidentally coloring over some of the desired black lines.
Before You Begin
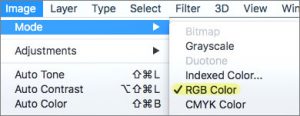
Some clipart images you start with may be grayscale (black, white, and grays only) or indexed color (a very limited set of colors). You won’t be able to add the colors you want until you change the file to accept all colors. This setting is called the “mode.” You’ll need to change the mode to RGB, so you’ll have all the colors to work with. You’ll find this setting in different places depending on the graphics program you are using. In Photoshop, this is what the setting will look like:
Now the Fast, Fun Secret to Coloring ClipArt!
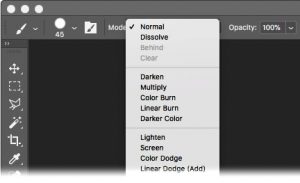
When you use the paintbrush in “normal” mode, the color on the brush replaces the color on the clipart. That’s great if you want to cover the image, but not if you want to color it. Instead, you need to paint with your brush in either a “darken” or “lighten” mode. The setting for your brush will be in different places depending on the graphics program you are using. In Photoshop, this is what the setting will look like:
Painting in the Lighten Mode
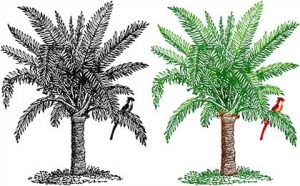
The lighten mode will lighten anything you paint over to the color on your brush. If you paint over white, nothing will happen because white is already the lightest color. If you paint over black, the black will lighten to the color on your brush. In the image below, the tree on the left is the original black-and-white clipart. The image on the right was painted over with the brush set to the lighten mode. Coloring the image took less than a minute.
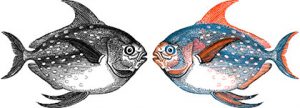
Lighten mode works best with original images that have lots of dark areas, so there’s lots to color. You might want to try decreasing the opacity of your brush so you can build up multiple brushstrokes of overlapping colors. The fish image below took about two minutes to colorize and with half-dozen different color choices.
Painting in the Darken Mode
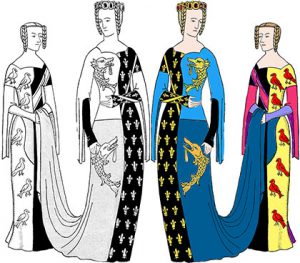
The darken mode works the opposite of the lighten mode. It will darken anything you paint over to the color on your brush. If you paint over black, nothing will happen because black is already the darkest color. If you paint over white, the white will darken to the color on your brush. This is the mode you will use if you want to color an image as if it were a coloring book. Since your brush won’t change the existing black lines, you don’t have to worry about covering them up as you would if your brush were in the normal mode.
You can also mix both lighten and darken techniques in the same illustration. In the image below, the butterfly was “colored in” using the darken mode and the background grass was changed to green using the lighten mode.

Using Colorized Clipart in the Classroom
Now that you know how easy it is to paint in the lighten and darken modes, you’ll find lots of classroom uses.
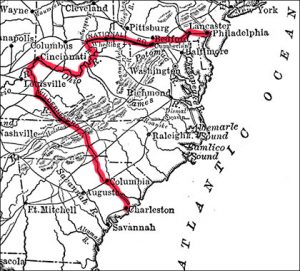
Use the darken mode to highlight areas of a black-and-white image:

The darken mode is also great for writing on black-and-white maps. You could trace the route of an explorer or show the travels of a character from literature.
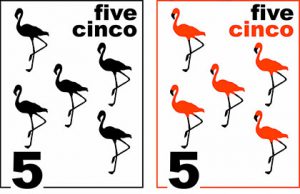
Use the lighten mode to add splashes of color to classroom displays.
Exploring Further
Once you’ve mastered using the lighten and darken painting modes, you’ll want to explore further. Instead of always using the darken mode, you may want to try the multiply mode. It produces similar results. Likewise, the screen mode will produce results similar to the lighten mode. You can also try adding a layer overtop of your clipart and changing the blending mode of the layer, but that’s a topic for another post.
Additional Graphics Posts
- Colorizing ClipArt: Intro to Blending Modes
- Colorizing ClipArt: Using Gradient Maps
- Four Ways To Emphasize the Subject in Instructional Graphics
- Photo or Illustration?
- Using ClipArt ETC for Flyers and Newsletters
- Paper People for Your Preso
- Cutout People for Digital Narratives
- Converting Raster Clipart to Vector
- Signs for the Times: Repurposing ClipArt ETC traffic signs
- 4,000 Drop Caps: When and how to use FCIT's drop cap collection in your documents
- Custom Banners: How to manipulate an image so that it tiles (repeats) seamlessly
Roy Winkelman is a 40+ year veteran teacher of students from every level kindergarten through graduate school. As the former Director of FCIT, he began the Center's focus on providing students with rich content collections from which to build their understanding. When not glued to his keyboard, Dr. Winkelman can usually be found puttering around his tomato garden in Pittsburgh. Questions about this post or suggestions for a future topic? Email me at winkelma@usf.edu. To ensure that your email is not blocked, please do not change the subject line. Thank you!
FCIT Newsletter
Each month FCIT publishes a newsletter with short articles on teaching and learning with technology, using digital content in the classroom, and technology integration. Subscribe today! The subscription form will open in a new window. When you have subscribed, you can close the new window to return to this page.
