The ClipArt ETC website includes over 70,000 images for classroom use. The majority of the images are scans of illustrations from 19th-century textbooks, but there are also many thousands of vector illustrations created by FCIT staff. I frequently receive questions from users about the difference between the scanned images (raster files) and the images we created (vector files). Sometimes, users need to convert between a raster and a vector format for a specific purpose.
In this post, I’ll explain the difference between raster and vector image files and then show a couple of ways to create a vector file from one of our raster scans.
Raster vs Vector Images
A raster image is a grid of pixels. Each pixel is assigned a particular color value. This is the type of image file you create when you take a photograph or scan something. If you zoom far enough into a raster image, you’ll see the individual pixels. Here’s an example of zooming in on a strawberry from the ClipPix ETC website.
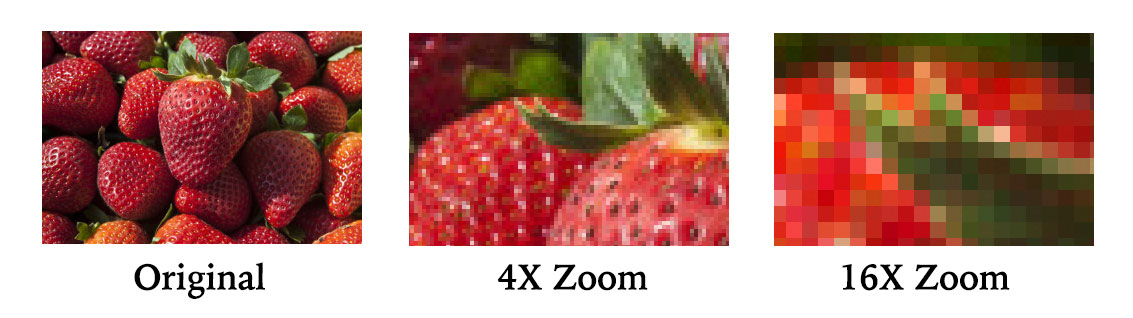
Examples of raster format files include PNG, JPG, and GIF.
On the other hand, a vector image is a set of mathematical instructions. Think of the formula for a circle. It doesn’t matter how large you draw the circle, the line is always going to be, well, round. Here’s an example of zooming in on a strawberry that was created in a vector drawing program.
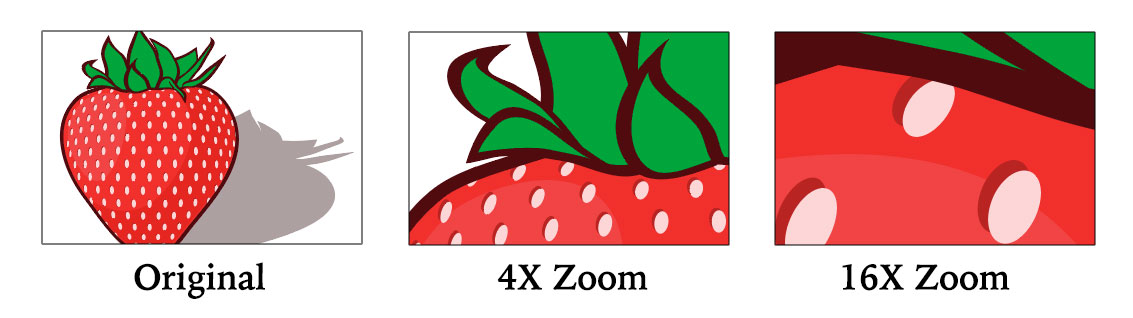
Examples of vector format files include EPS, SVG, and AI.
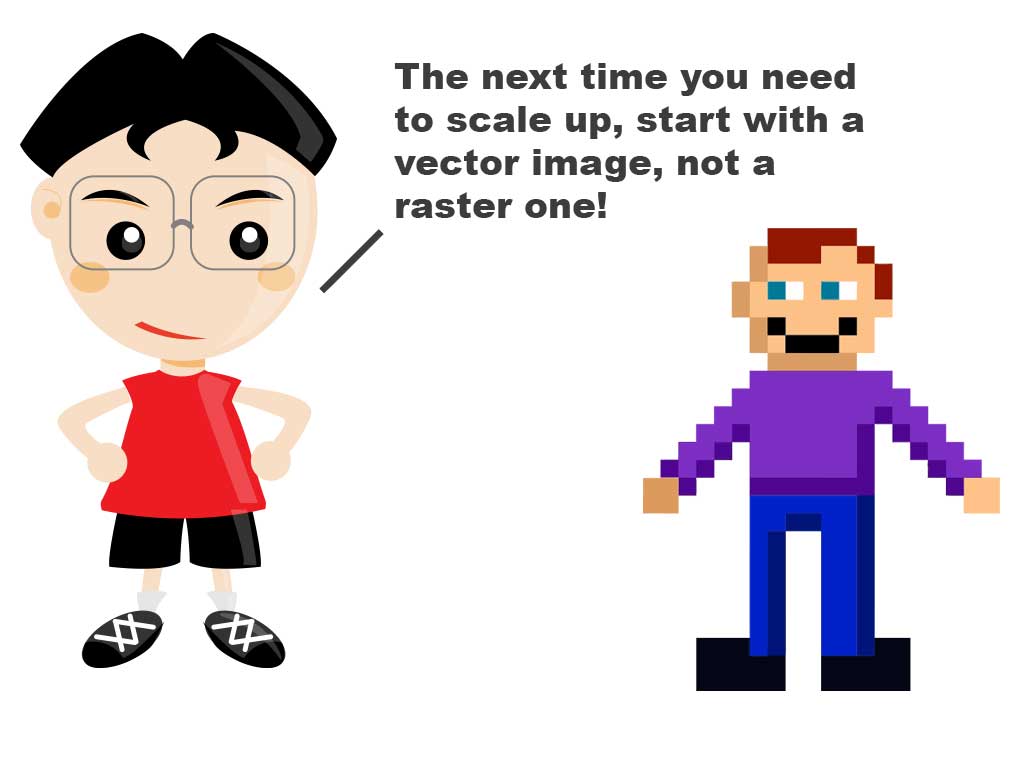
Got it? Now you can enjoy this cartoon from the cartoons section of TIM resources.
There can be many reasons for preferring a vector image file to a raster file, but the two most common reasons users contact me are either:
- They want an image they can enlarge greatly—for example they want to project it onto a cafeteria wall to trace and paint as a large mural.
- They want to smooth out and simplify a detailed raster image—perhaps for use as a school logo.
Converting a Raster Image into a Vector Image
The best way to convert a raster image to a vector image is to use a vector drawing program like Adobe Illustrator. If you’re in a hurry or don’t have access to a drawing program, there are free online services you can use. In general, you will have much less control using a free online service however.
Online services. Due to changing URLS and advertising content, I don’t want to link directly to any of the online services. Doing an internet search for “vectorizer” or “convert raster to vector” will give you many results. The interface for most services is very simple. You’ll upload your raster file and within a few seconds, you’ll be able to download a vector file. Some services will give you a few choices about what size speckles to ignore or how much to smooth curves. You can experiment until you get the best result. If you want to vectorize a GIF file from the ClipArt ETC website, you’ll find that some of the online services do not accept the GIF format. The fastest way to convert the GIF image is just to take a screenshot of it. Screenshots on both Mac and Windows are in the PNG format, which is accepted by all of the online services I tried. If your resulting vector image is unsatisfactory, you can try a different service. I found a great variety of output when uploading the same raster file to different services.
Using Adobe Illustrator. This is my preferred method, not only because it gives me much greater control over the vectorization process, but also in most cases I’m going to be doing further editing of the vector file anyway.
First, open the image in Illustrator. Then open the “Image Trace” window. If this is your first time using Image Trace, start by clicking on the various preset buttons at the top or selecting presets from the dropdown menu. Within a few seconds, you’ll see the preview image. You can continue to experiment as long as you wish. Once you’ve settled on a preset, then you can begin to customize the result further using the following options.
Threshold: Pixels darker than the threshold are converted to black. Move left for more white areas. Move right for more black areas.
Paths: Higher value means a tighter fit. Move left for a simplified, more abstract result. Move right for a more realistic result.
Corners: Higher value means more corners.
Noise: Reduces noise in images. Higher values mean that more noise will be eliminated in the result.
Fills and Strokes: Choose to have filled areas, strokes, or both. Strokes only will result in a line drawing.
Ignore White: White areas won’t be filled so anything you place behind the image will show through where the white was.
Once you are satisfied with the preview, click the “Trace” button at the bottom of the window. If you want to do further editing, click the “Expand” button. You’ll probably also want to “Ungroup” the image.
The best way to learn what your options are is simply to experiment with the settings. The following screenshots, however, will give you some idea of what to expect.
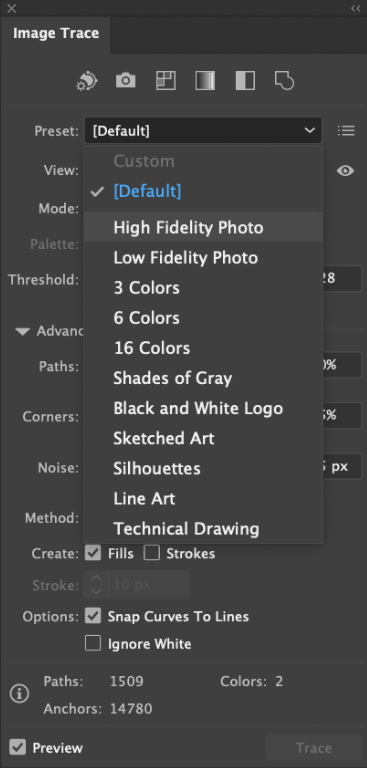
The six buttons across the top of the Image Trace window and the various presets in the dropdown window will get you started on the conversion process. Once you’ve selected a preset as a starting point, you can then adjust the other settings as appropriate.
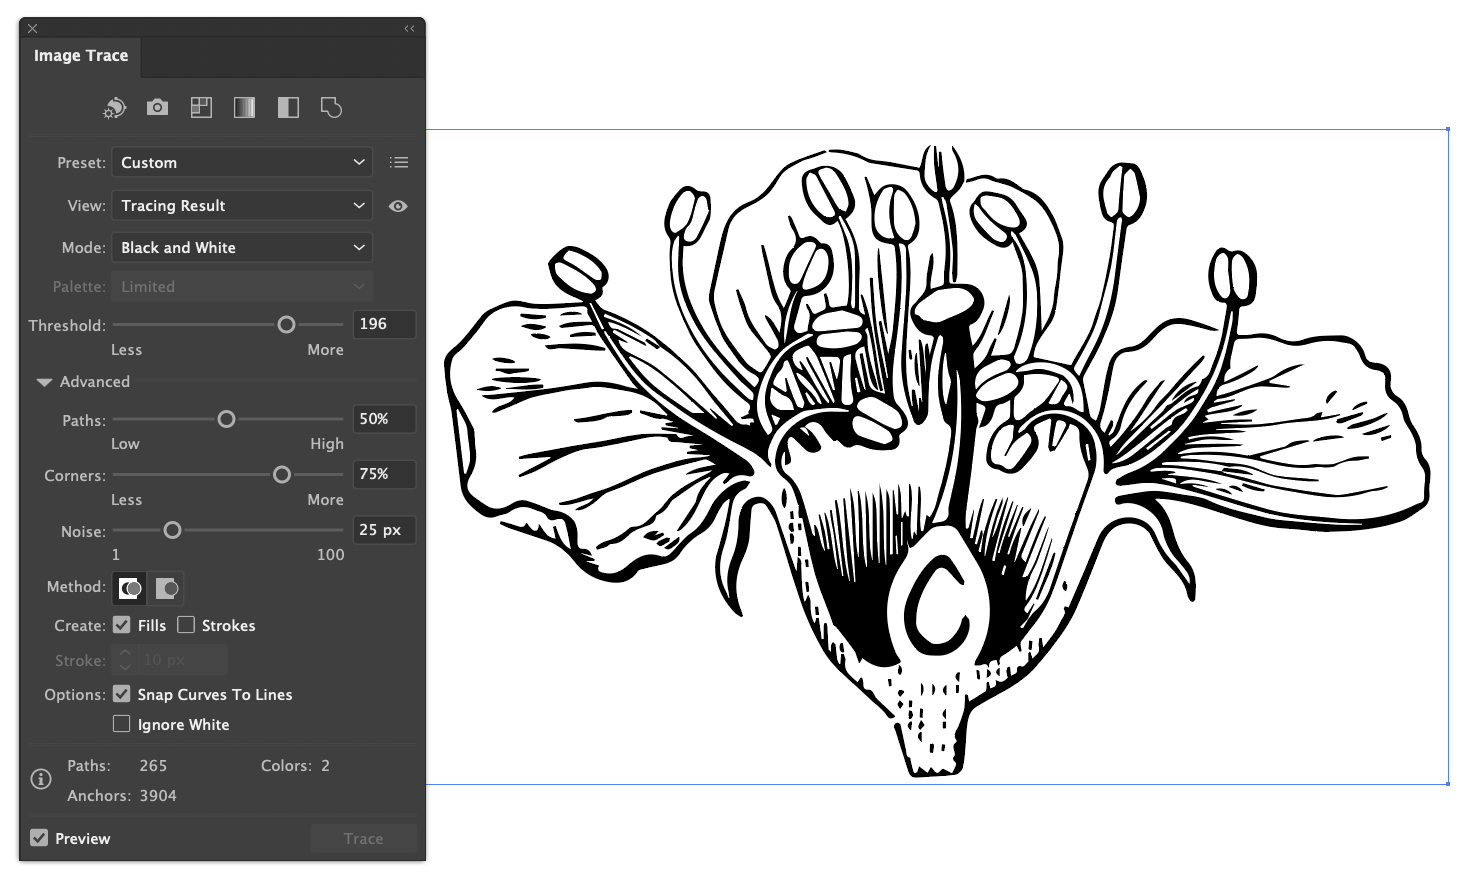
Above is an example of using the vectorization process to smooth out and simplify a flower anatomy illustration from the ClipArt ETC website. The smoothed image would look better than the original raster image if printed on a worksheet or enlarged on a classroom poster.
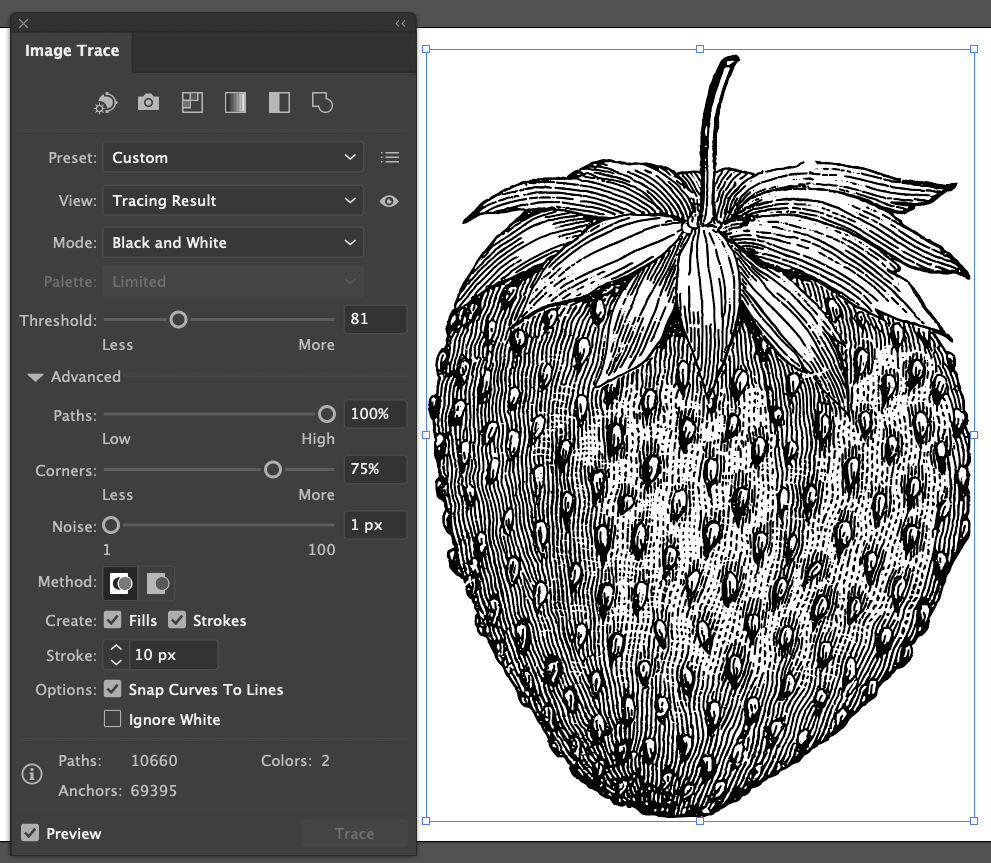
The settings above retained most of the detail of the original ClipArt ETC image in the result.
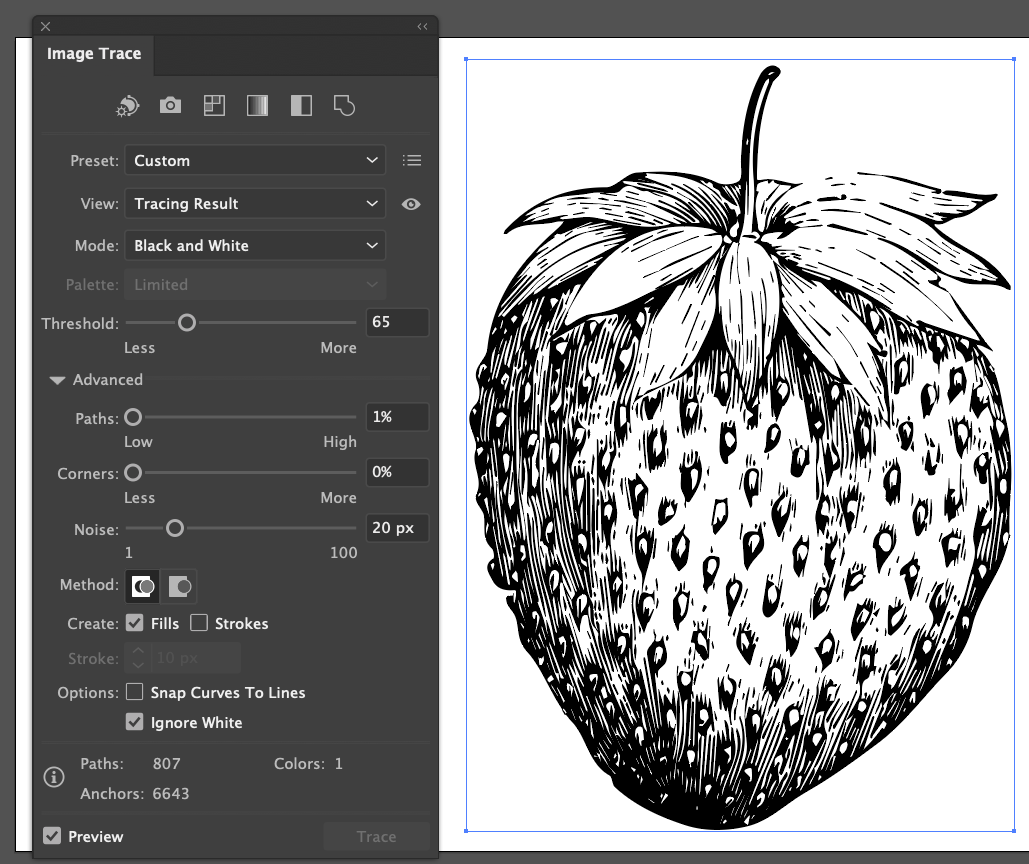
These settings greatly simplified the image.

Unchecking “Fills” results in a line drawing.

The questions I receive about converting images to vector are usually about clipart, however the same process can be used with full-color photographs as in this example of vectorizing a sunflower photo.
I hope these examples have given you a taste of what can be done to convert raster images to vector. The best way to learn is just to play around with the settings until you achieve your desired result.
Additional Graphics Posts
- Colorizing ClipArt: Intro to Blending Modes
- Colorizing ClipArt: Using Gradient Maps
- Four Ways To Emphasize the Subject in Instructional Graphics
- Photo or Illustration?
- Using ClipArt ETC for Flyers and Newsletters
- Paper People for Your Preso
- Cutout People for Digital Narratives
- Converting Raster Clipart to Vector
- Signs for the Times: Repurposing ClipArt ETC traffic signs
- 4,000 Drop Caps: When and how to use FCIT's drop cap collection in your documents
- Custom Banners: How to manipulate an image so that it tiles (repeats) seamlessly
Roy Winkelman is a 40+ year veteran teacher of students from every level kindergarten through graduate school. As the former Director of FCIT, he began the Center's focus on providing students with rich content collections from which to build their understanding. When not glued to his keyboard, Dr. Winkelman can usually be found puttering around his tomato garden in Pittsburgh. Questions about this post or suggestions for a future topic? Email me at winkelma@usf.edu. To ensure that your email is not blocked, please do not change the subject line. Thank you!
FCIT Newsletter
Each month FCIT publishes a newsletter with short articles on teaching and learning with technology, using digital content in the classroom, and technology integration. Subscribe today! The subscription form will open in a new window. When you have subscribed, you can close the new window to return to this page.