We always encourage TIM Tools clients to customize their TIM Tools site. Most customizations are things that the user never sees, such as roles and permissions. In this post, however, I’d like to focus on three areas that all users will see: your site banner, homepage layout, and the Teacher Center. Each provides an opportunity to make TIM Tools your own.
Site Banner
The site banner appears at the top of every page and is the easiest to customize. In the Admin Center, just click on the banner you want and it will instantly appear throughout the site. You can leave it as the default, select one of the many built-in banners, or point to your own file such as school colors or a purpose-built graphic as in the following examples from current TIM Tools sites. In an earlier post, I explained how to create custom banners that tile seamlessly.

Site Homepage
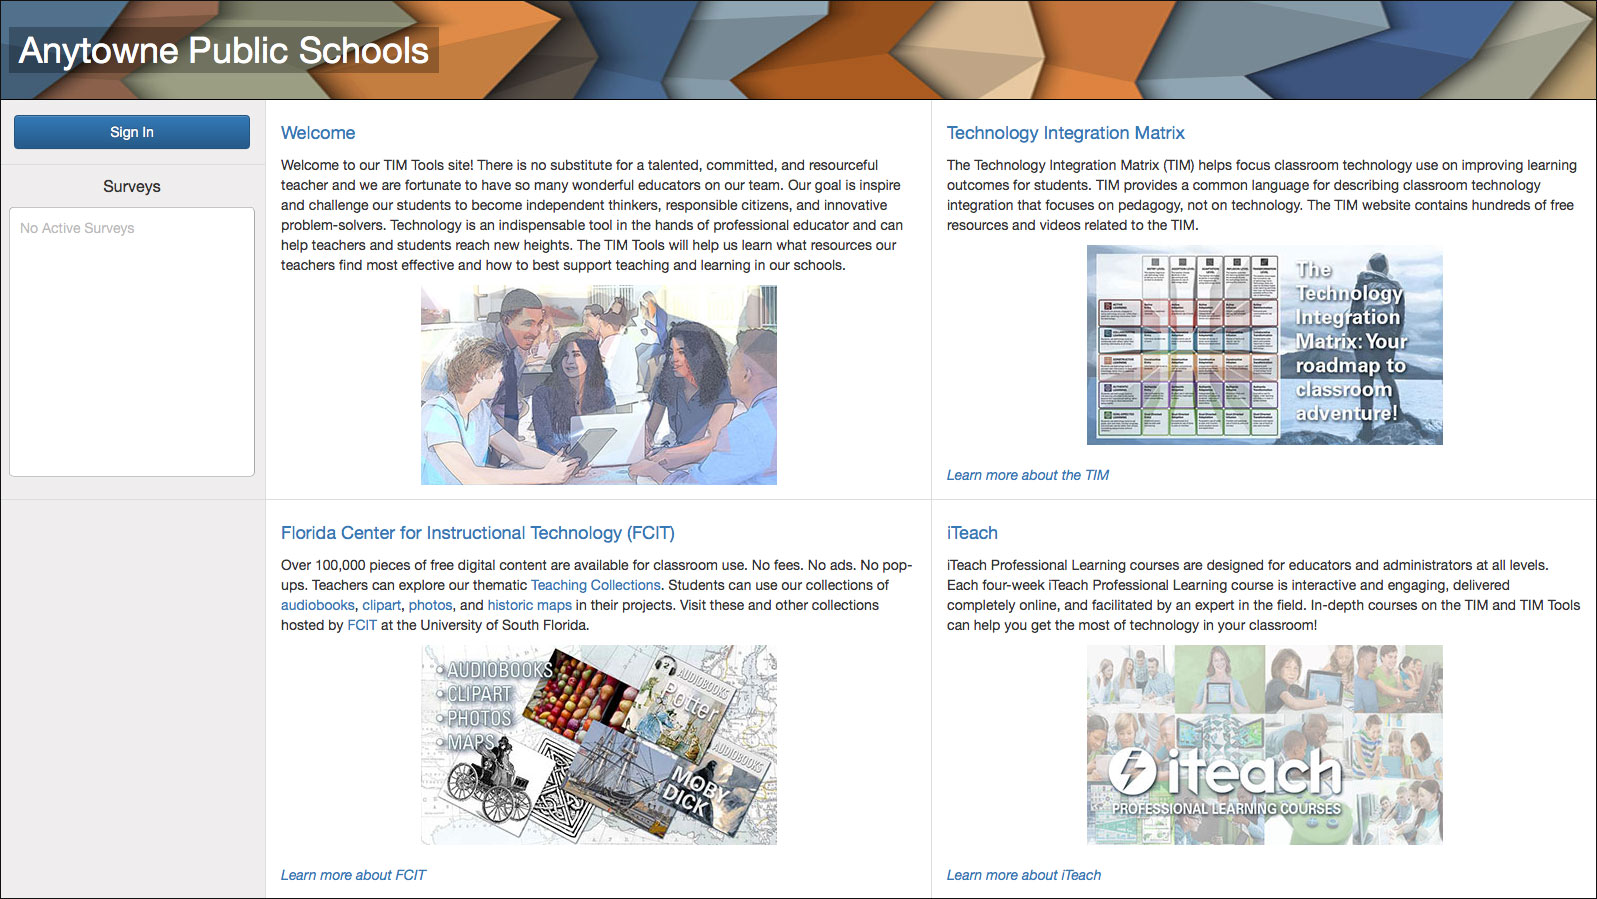
Right out of the box, a TIM Tools site has a homepage with four modules displayed. One is a customizable welcome message. The other three fixed modules are about the TIM, FCIT resources, and iTeach courses. These three modules cannot be edited, but they can be turned off in the Admin Center. Here’s what the homepage looks like with all four modules displayed:
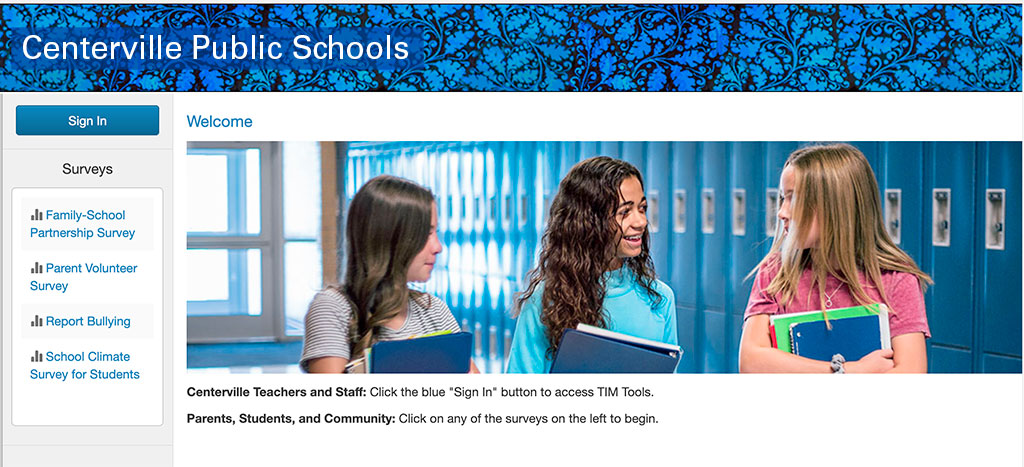
If you turn the three fixed modules off, the only remaining content is the editable welcome module which now fills the entire area. You can use the built-in HTML editor (see “Using the HTML Editor” section below) to create your own text and display your own images. Here’s a TIM Tools site with both a custom site banner and custom homepage text and images:
To create the fictitious “Centerville” site homepage below, I turned off the three fixed modules, added a school photo, and wrote text that clarified where the teachers and staff should click to sign in, and where students, parents, and other community members could select public surveys:
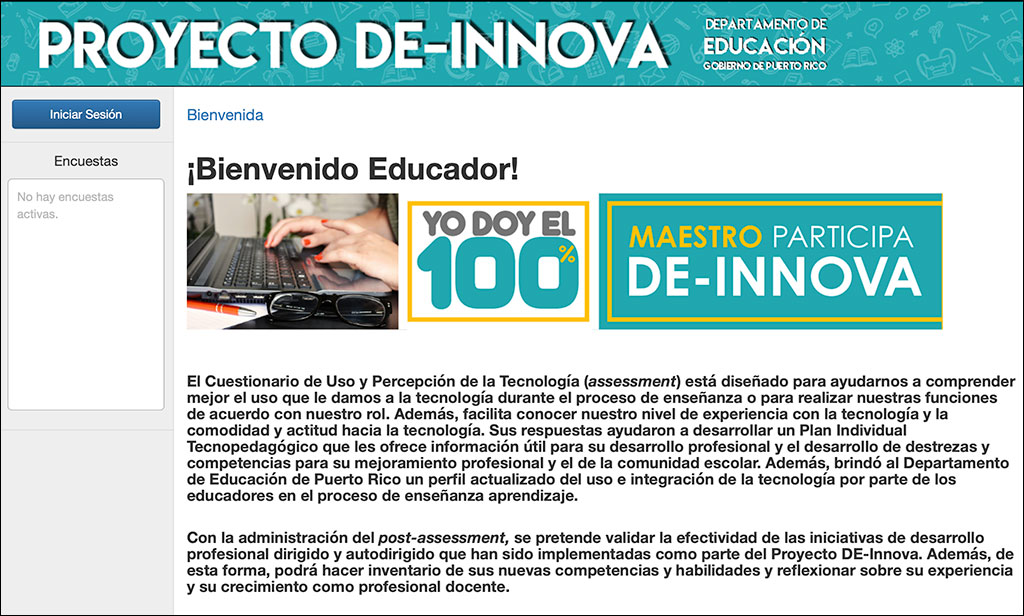
You may want to use the homepage for a welcome message from the superintendent or school head, for a project overview if the TIM Tools are being used primarily for project evaluation, for an introduction to a tech initiative, or any other description that gives a context for the use of the Tools. You can also use the HTML editor to insert links to other webpages or create email links.
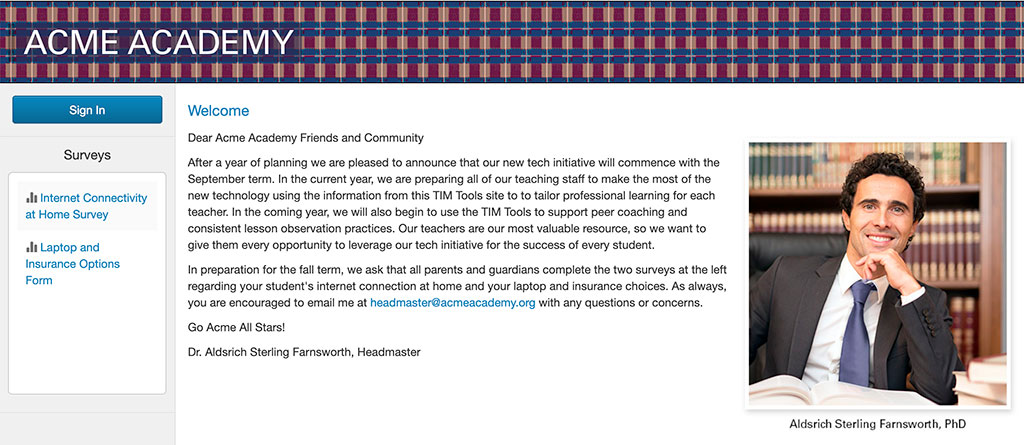
The fictitious “Acme Academy” homepage below explains the purpose of TIM Tools and directs parents to complete two surveys regarding an upcoming initiative:
Teacher Center
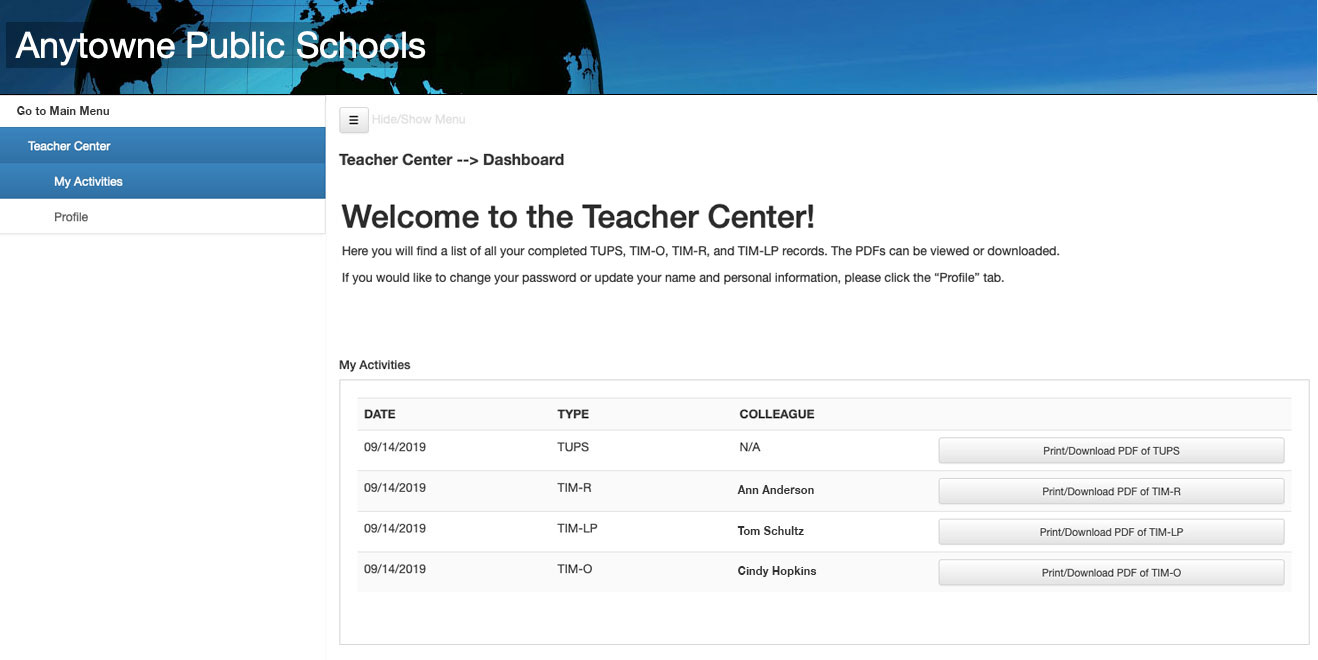
While everyone visiting your TIM Tools site sees the public homepage, only those who log in will see the Teacher Center. The Teacher Center is the first page to display once any user has logged in. It contains links to all of the user’s current records. Like the homepage, the Teacher Center also has an editable area. This provides a convenient opportunity to explain the context for the use of TIM Tools or to share announcements or timelines. Direct links can also be added to any of the tools. Right out of the box, the Teacher Center is rather plain:
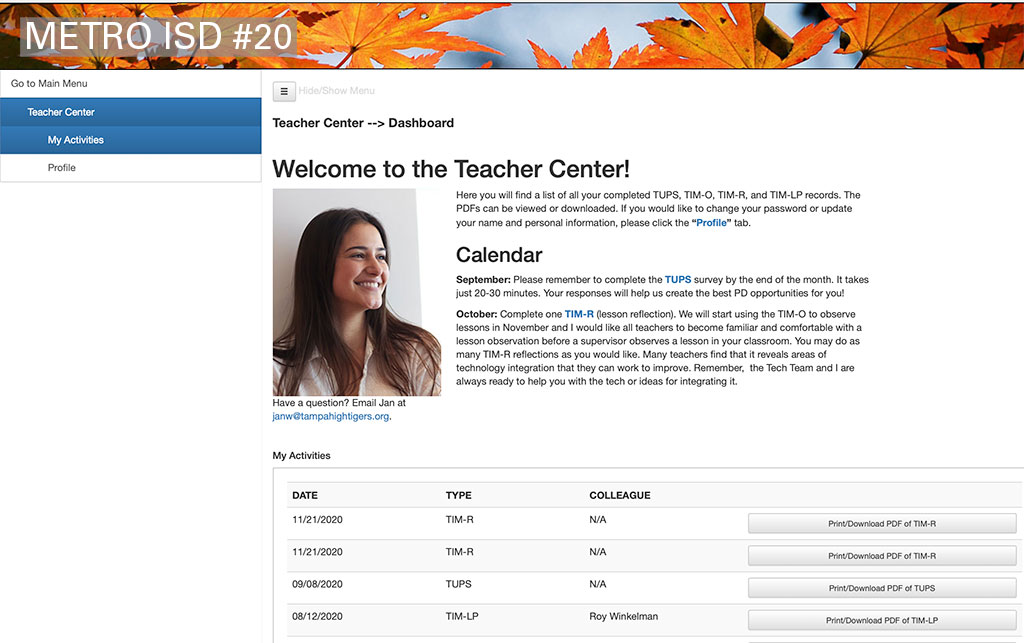
On the fictitious “Metro ISD” site below, I personalized the Teacher Center with a photo and email link of the tech director. I also added a calendar with direct links to the tools the teachers would be using during the upcoming months:
Using the HTML Editor
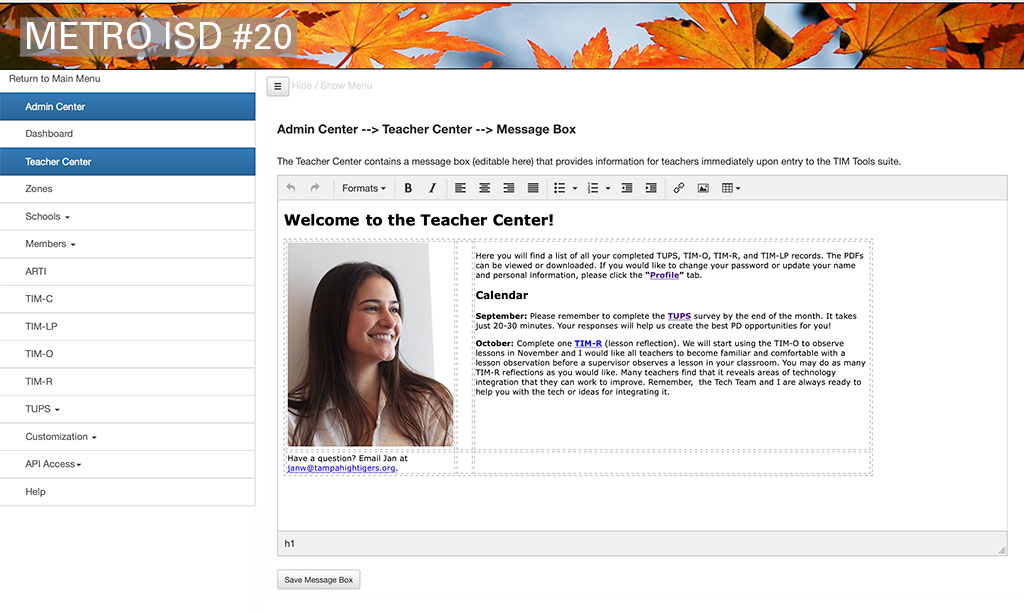
The built-in editor is the same for both the homepage and the Teacher Center. No knowledge of coding is required. If you can use a word processor, you can use this editor. Here’s what the editor looked like when I was creating the “Metro ISD” Teacher Center example above:
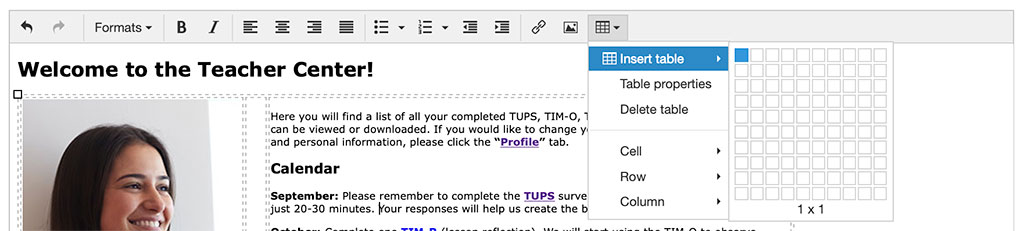
If you want to make a somewhat complex layout, you should start with a table. The table tool over on the right allows you to create a table with any number of rows and columns. (I worried for a moment about offending HTML purists with the notion of using a table for layout, but then realized that none of them would be reading the directions for a WYSIWYG editor anyway.) Once the empty table appears, you can resize it however you want. What you see is what you’ll get with this editor.
Advanced users may want to poke around in table, row, and cell properties from this menu to set such things as background and border colors, padding and spacing, or vertical alignment; but most users can ignore those settings.
The Formats dropdown menu allows you to format any selected text you’ve entered:

Use the “B” or “I” buttons to make selected text bold or italicized:

Use the four alignment options to left align, center, right align, or justify selected text:

The next option allows you to create a bulleted list with your choice of bullet styles:

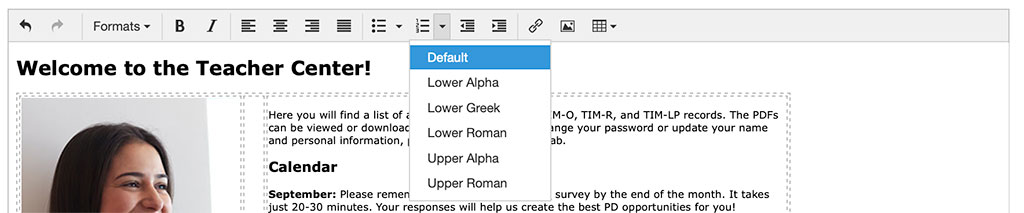
And next to that is the dropdown menu for ordered lists with the usual numbering choices:
The next two icons allow you to decrease or increase the indention of a block of selected text:

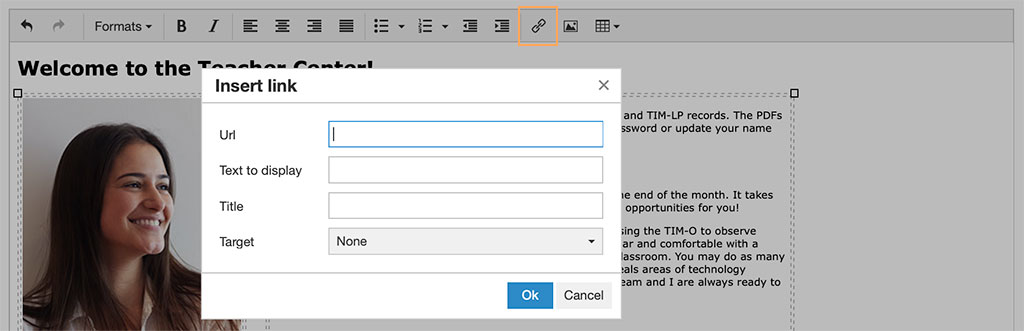
The link icon creates links for selected text or image. Just select the text or image you want to be a link and click this button. Enter the URL in the top box of the pop-up window. Your selected text will be displayed in the second box. Whatever you enter into the Title box will be displayed whenever someone hovers over the text or image. Finally, you can change the Target setting so that the link opens in a new window. You’ll probably want the new window option if your link is going outside of the TIM Tools site.
If you want to create an email link instead of a webpage link, just type “mailto:bob@school.org” into the URL box without using any spaces. Obviously, you’d need to replace Bob’s email address with your intended address.
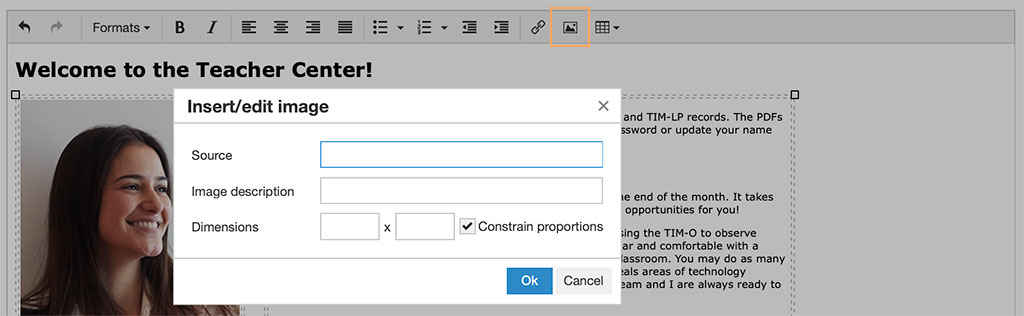
Last, but not least, click the picture icon to insert an image. In the pop-up window paste the URL where you image is located and for accessibility purposes, you should include a description of the image.
Your users will appreciate the customizations. Some schools or districts attempt to match the branding of their main website. Other clients like to mix things up with frequent updates of homepage or Teacher Center messages or images. It takes only a few seconds to switch the site banner to match the season or other events.
As always, just email us at TIM@fcit.us with any questions or comments about your site. We’re happy to send answers, schedule a videoconference, or just do processes for you such as uploading members or editing your homepage or Teacher Center. Your TIM Tools site is very flexible. We want to help you make it work best for your school or district!
Roy Winkelman is a 40+ year veteran teacher of students from every level kindergarten through graduate school. As the former Director of FCIT, he began the Center's focus on providing students with rich content collections from which to build their understanding. When not glued to his keyboard, Dr. Winkelman can usually be found puttering around his tomato garden in Pittsburgh.