Menu
1. TIM Tools Admin Center
The Admin Center provides for management of the TIM Tools suite of applications.
Overview
Getting Started
- Admin Center Access
- Admin Center Dashboard
- Managing Zones (for Districts)
- Managing Zones (for Regional Service Agencies)
- Managing Zones (for Education Ministries, Consultants, Grantors, and Others)
- Managing Schools
Customization
Managing Members
- Uploading and Updating Members
- Profile Screen
- Changing Passwords
- Defining Roles (for Districts)
- Defining Roles (for School Licensees)
- Defining Roles (for Education Ministries, RSAs, Consultants, Grantors, and Others)
Working with Data
- Participation Overview
- Downloading ARTI Data
- Downloading TIM-LP Data
- Downloading TIM-C Data
- Downloading TIM-O Data
- Downloading TIM-R Data
- Downloading TUPS Data
- Using TUPS, TIM-O, TIM-R, and TIM-LP Templates
2. TUPS
The Technology Uses and Perceptions Survey provides essential information for planning technology infrastructure and support and identifying the perceptions and PD needs of teachers.
- TUPS Intro
- Collection Frameworks
- TUPS Intro and Closing Text
- Customizing TUPS Sections and Items
- Accessing School or District TUPS Data
- TUPS Report Template
3. TIM-O / TIM-LP / TIM-R
These three tools are for classroom observation, lesson plan review, and teacher reflection.
Overview
Preparation
TIM-O
- TIM-O: Beginning an Observation
- TIM-O: Question-Based Method
- TIM-O: Matrix-Based Method
- TIM-O: Finishing an Observation
- TIM-O: Print or Share an Observation with a Teacher
- TIM-O: Editing Previous Observations
- TIM-O Report Templates
- Accessing School or District TIM-O Data
TIM-R
TIM-LP
4. TIM-C
The TIM-C allows a coach and client to document the goals, activities, progress, and outcomes of a coaching cycle.
5. ARTI
The ARTI tool provides a framework for teachers to design and conduct their own action research projects.
6. Report Tool
The Report Tool allows a school or district to create TIM-LP, TIM-O, TIM-R, or TUPS reports.
- Report Tool Intro
- Building a New Report
- View, Edit, or Delete Reports
- Interpreting TIM-O Report Data
7. Survey Tool
The Survey Tool allows a school or district to create internal or external surveys on new topics as needed.
- Survey Tool Intro
- Creating a New Internal Survey
- Creating a New Public Survey
- Adding Questions to Your Survey
- Customizing a Library Survey
- Viewing Survey Results
Need help?
Have a question?
Email us at TIM@fcit.us anytime. We want to help you get the most out of your TIM Tools account!
TIM Tools 7.5 Administration Guide
Downloading TIM-R Data
Members with roles that have “TIM-R: View and download data” enabled, will be able to download TIM-R data at their own administrative level using the Admin Center. That is, school leaders will be able to download TIM-R from their assigned school, zone leaders will be able to download TIM-R from their assigned their assigned zone, and district leaders will be able to access all TIM-R data from across the district.
1. Begin by selecting the TIM-R tab in the Admin Center. You will see the following window:
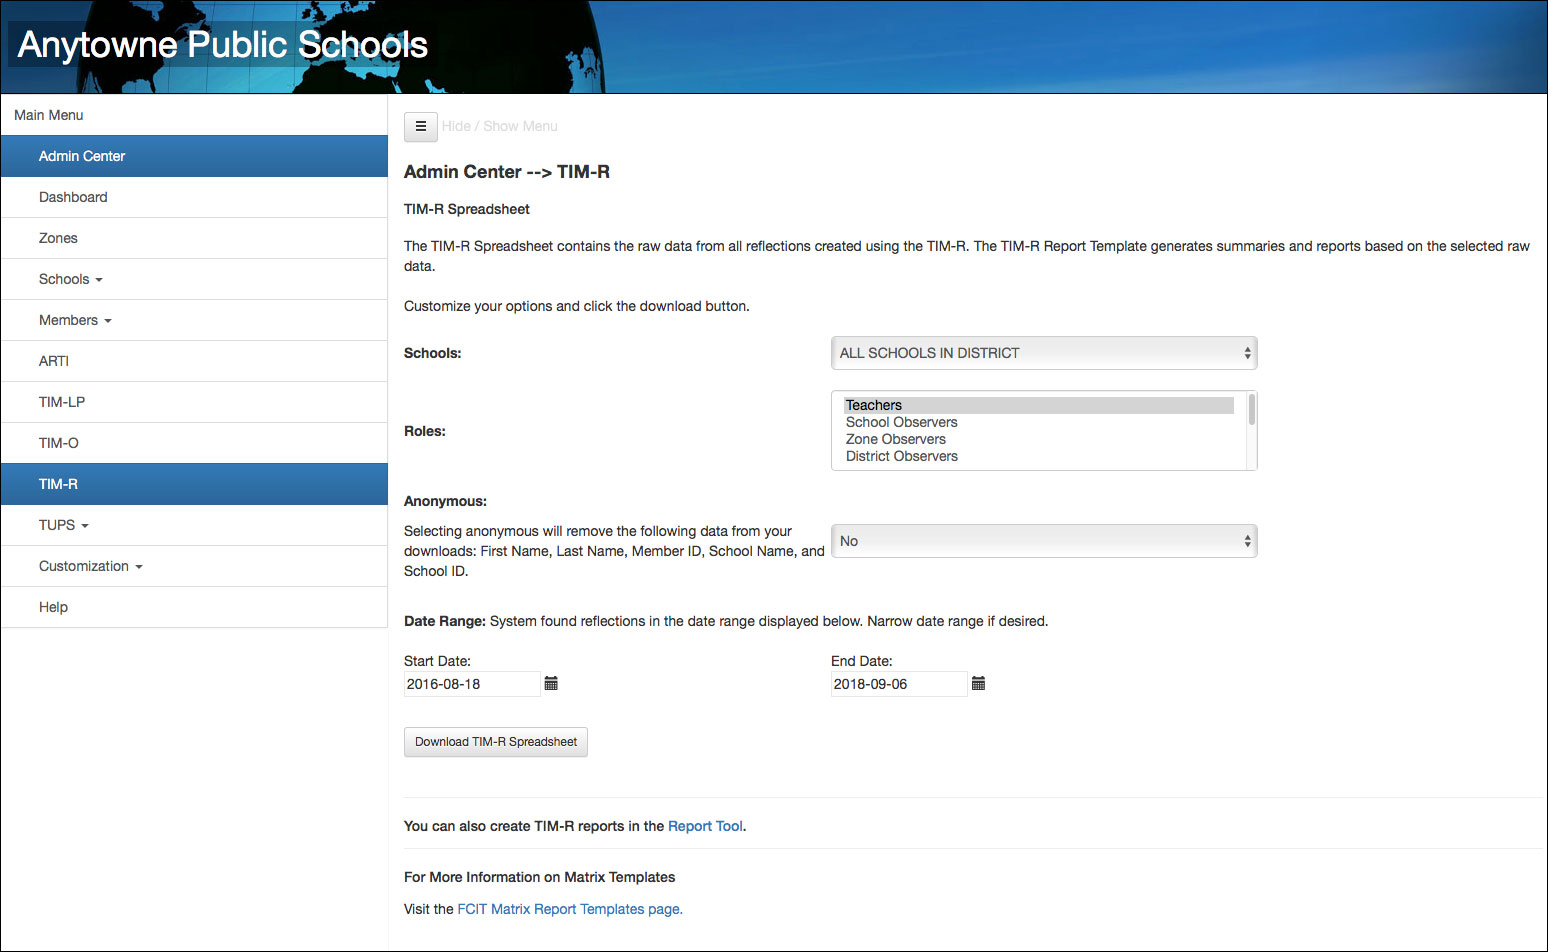 Figure 1. Opening TIM-R screen. No values have been selected by the user, however the Start Date and End Date have been automatically populated indicating the range of existing data.
2. Next select your target location(s) from the Schools dropdown menu.
Users with district-level TIM-R data access will be able to select all schools in the district or any particular school. Users with zone-level TIM-R data access will be able to select all schools in the zone or any particular school within the zone. The school will be pre-selected for users with school-level TIM-R data access.
To select more than one location, control-click using Windows or command-click using Mac.
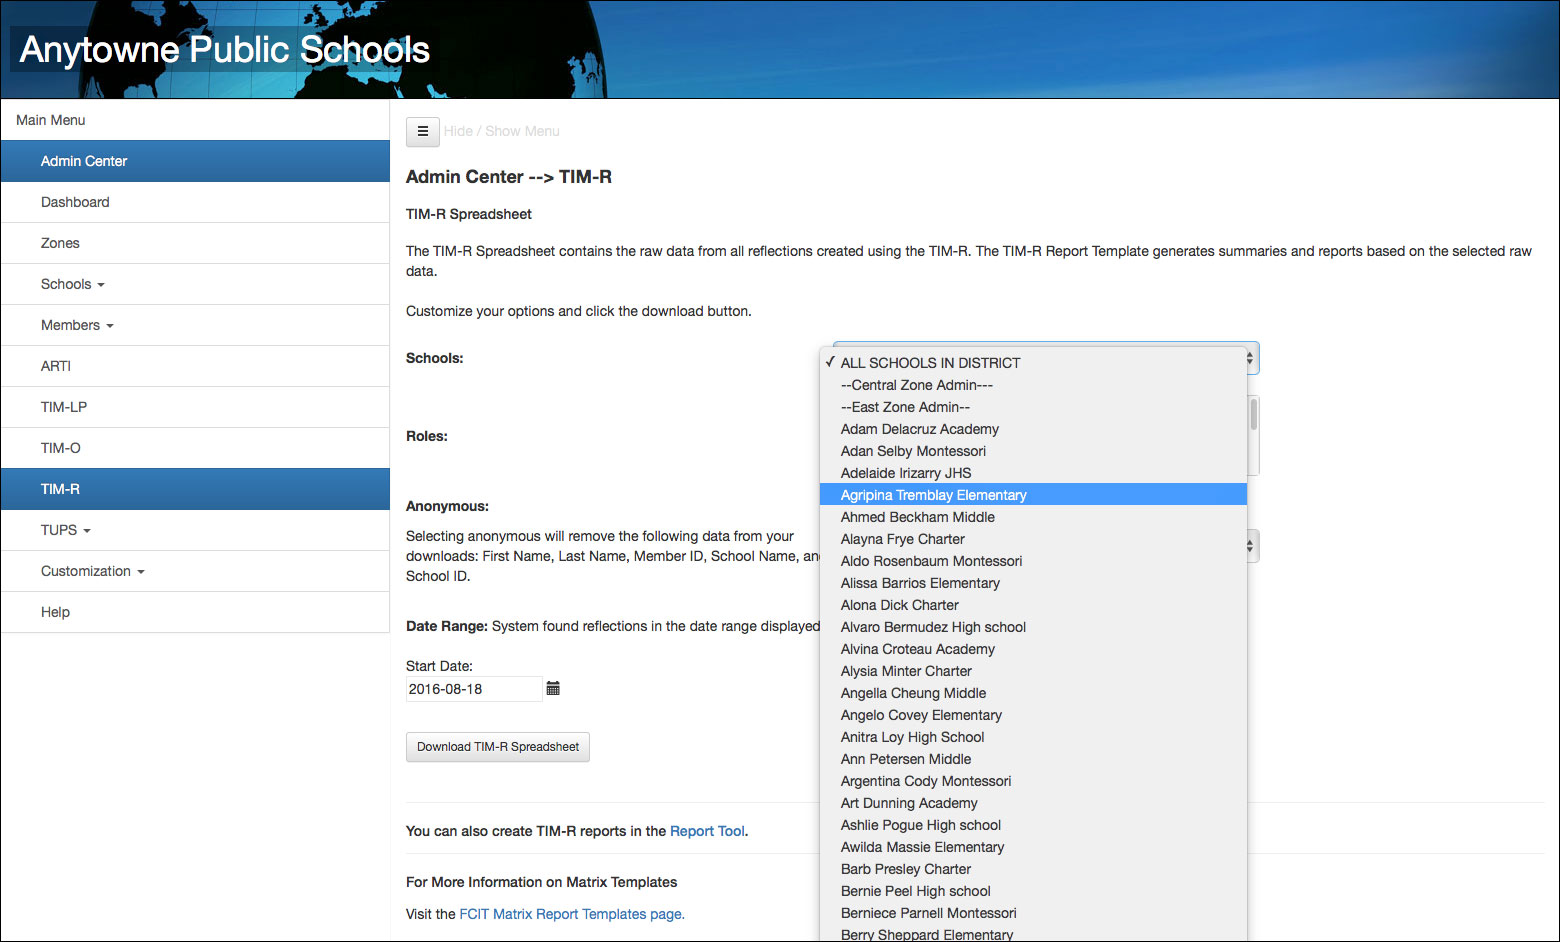 Figure 2. Selecting one school from the Schools dropdown menu.
3. Then select the target Role(s) you wish to include.
The default setting is to include Teacher data only. You can change this setting to include whatever combination of roles you would like. As above, control-click (command-click on a Mac) to select more than one role.
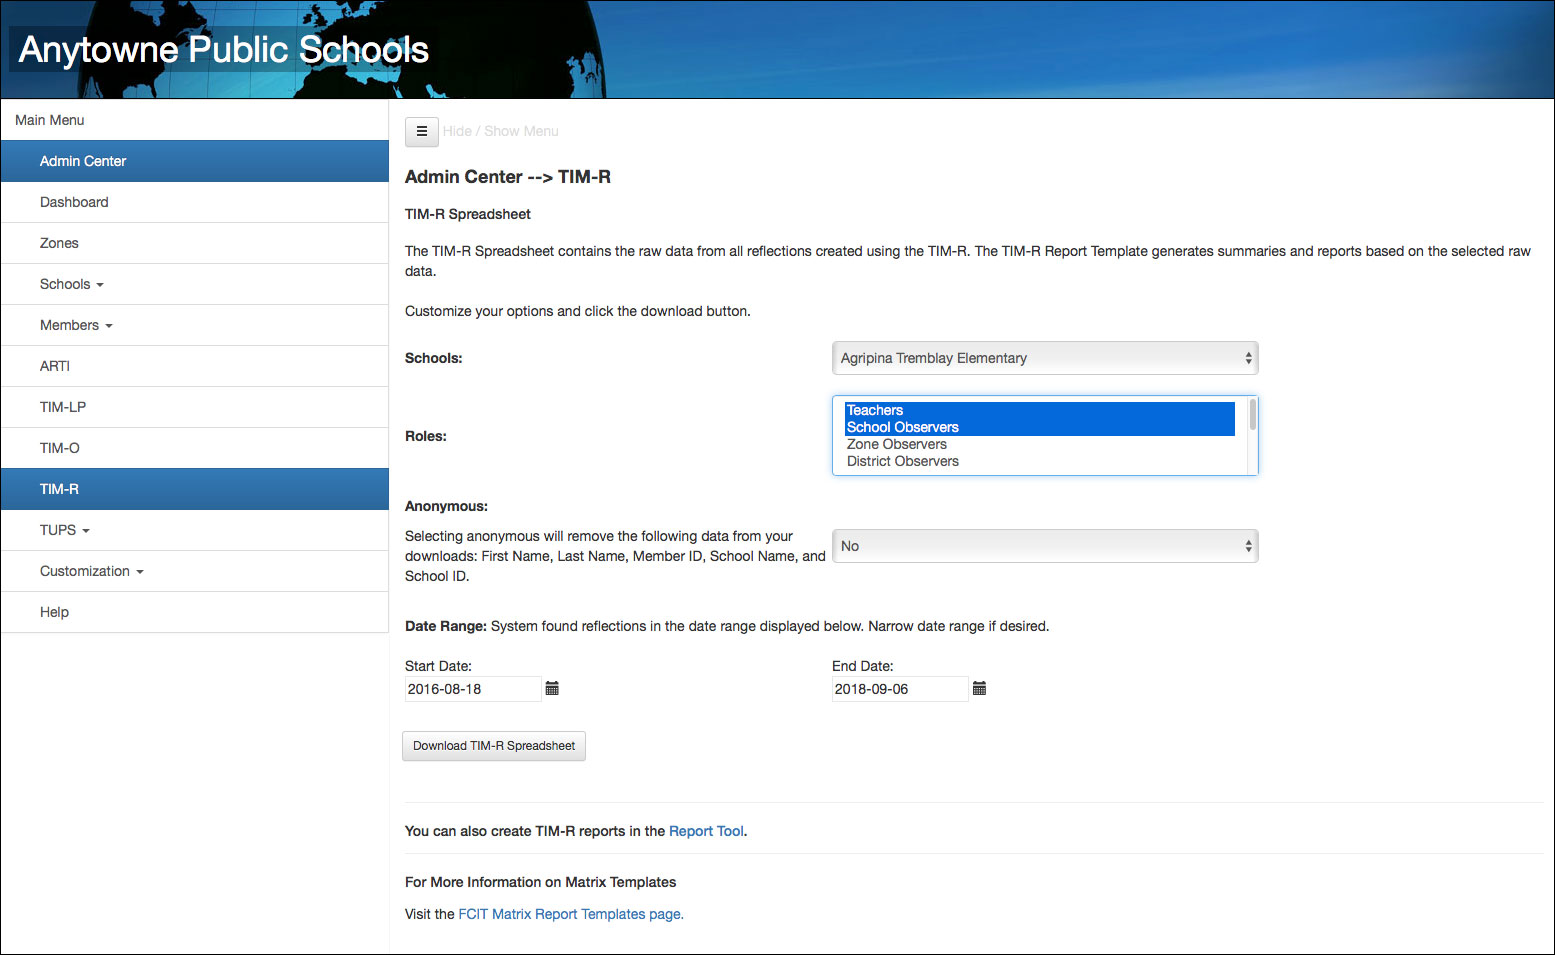 Figure 3. This user has selected both Teachers and School Observers. If you have designated some classroom teachers as School Observers, you’ll want to select them as well to include all teaching staff in the download. Alternately, you can scroll down to select “All Roles” at the bottom of the list.
4. Select whether you wish to “anonymize” the data or include identifying information.
Selecting Anonymous will remove the following data from your downloads: First Name, Last Name, Member ID, School Name, and School ID. There may be times when users wish to share data without identifying information. Note, however, that this selection simply removes the fields noted above. There still may be identifying information in the remaining fields such as the “Comments” column. Users must determine if eliminating these five fields meets their need for anonymized data.
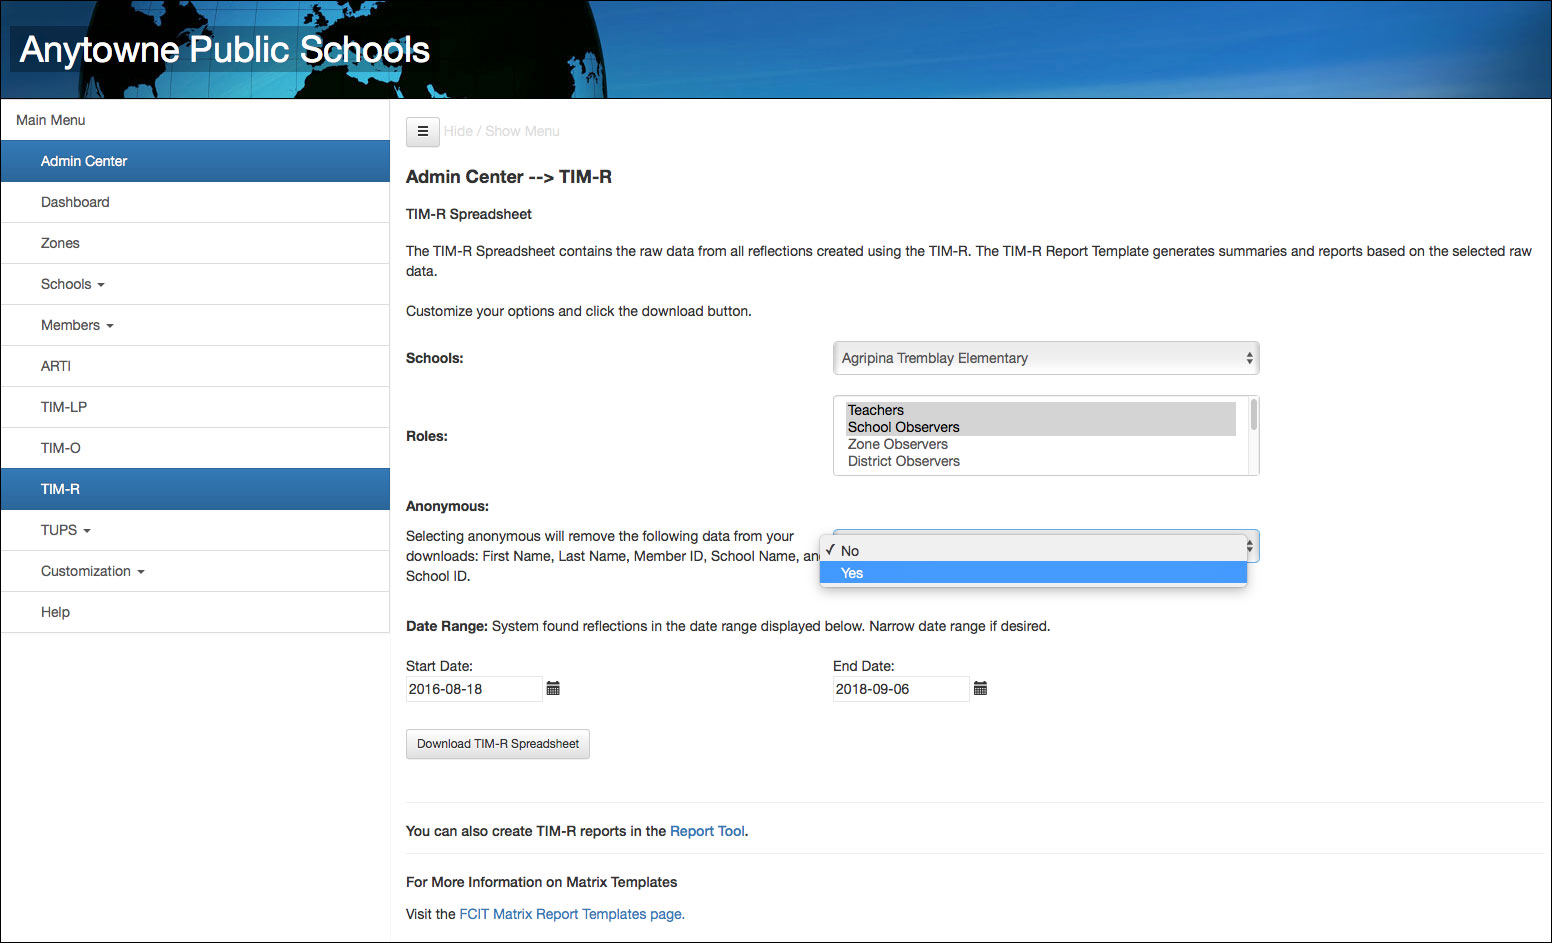 Figure 4. The user is changing the setting from the default “No” to “Yes.”
5. Next select the Start Date and End Date. If you leave the default dates unchanged, you will receive a download of every TIM-R Reflection. You can change both the Start Date and End Date to narrow the range if desired. Click the calendar icon to change the date.
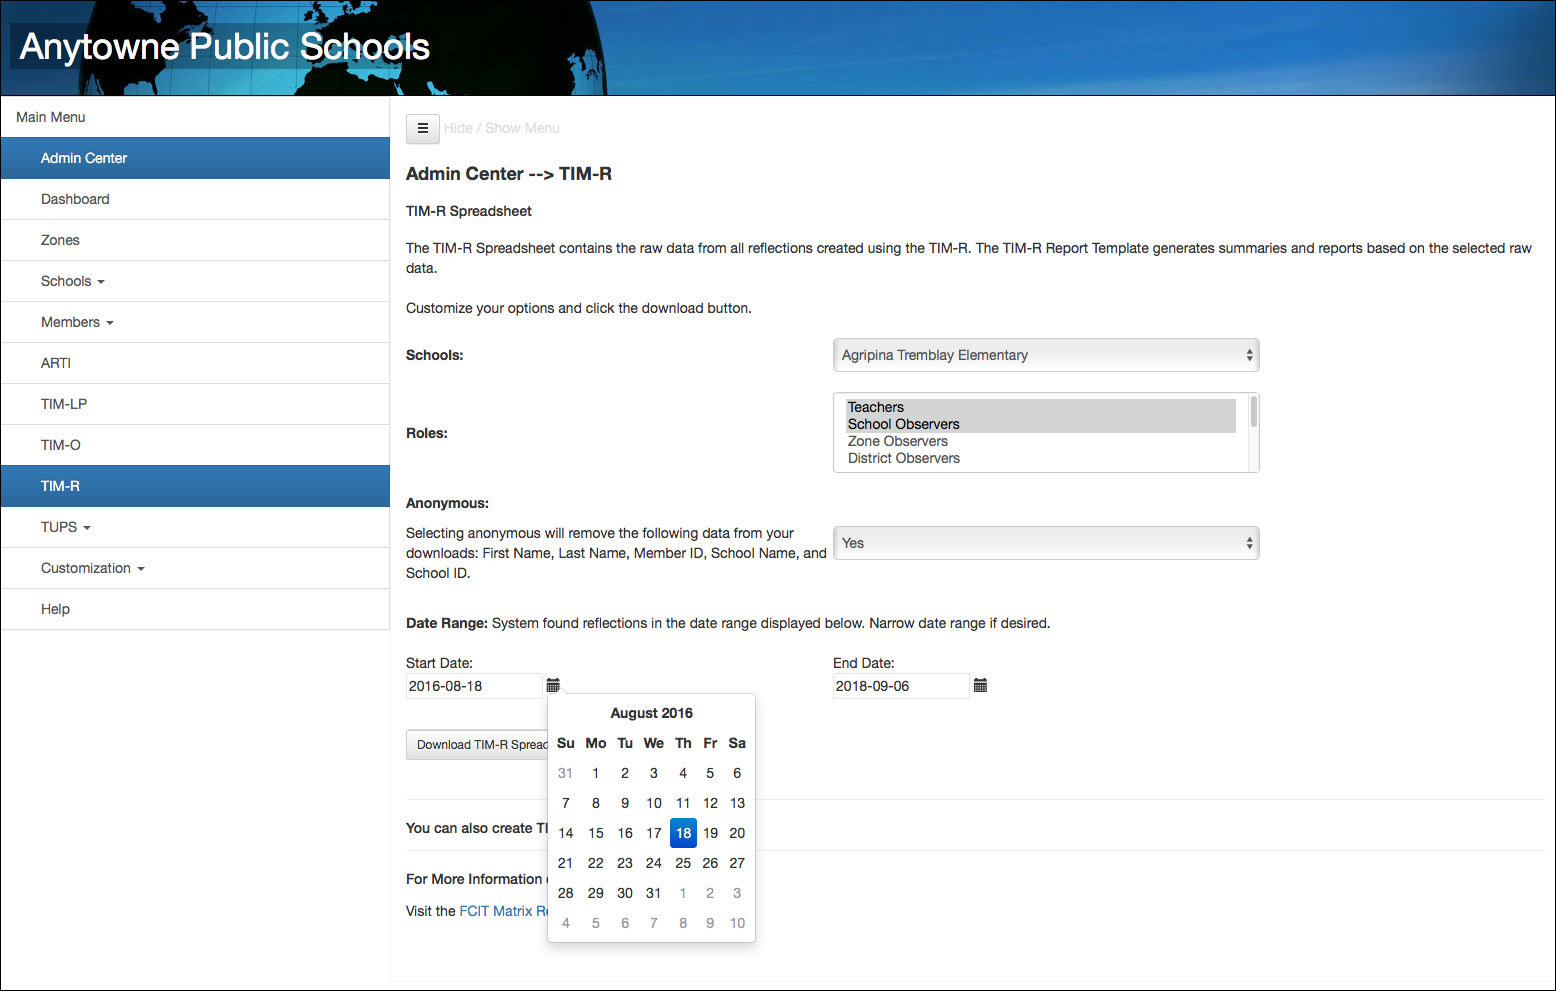 Figure 5. Opening the Start Date at left.
6. To navigate within the calendar, click the month heading to select a different month within the same year. Click the year heading to select a different year.
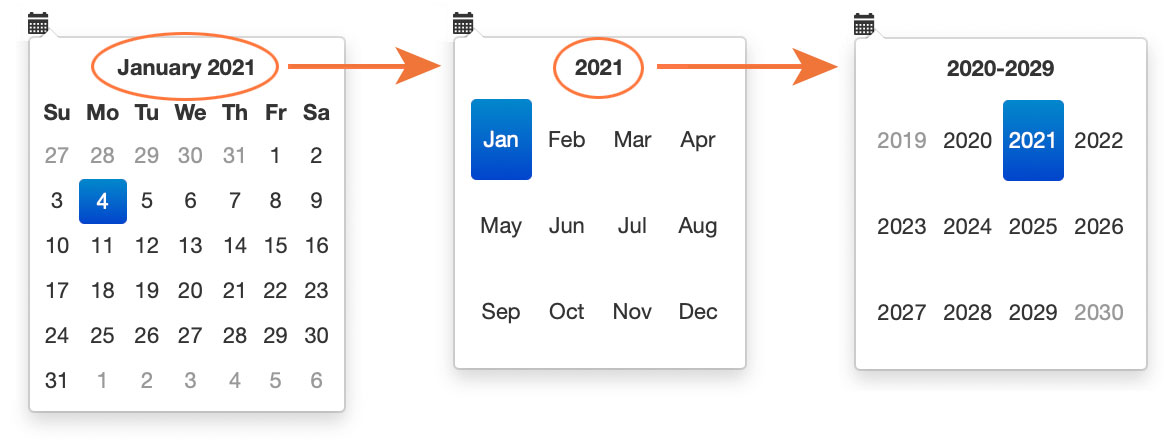 Figure 6. Moving from the opening month view, to a 12-month view, to a years view.
7. When your date range is set, click the Download TIM-R Spreadsheet button and the download will begin automatically.
8. TIM-R summary data is also available via the Report Tool.