Menu
1. TIM Tools Admin Center
The Admin Center provides for management of the TIM Tools suite of applications.
Overview
Getting Started
- Admin Center Access
- Admin Center Dashboard
- Managing Zones (for Districts)
- Managing Zones (for Regional Service Agencies)
- Managing Zones (for Education Ministries, Consultants, Grantors, and Others)
- Managing Schools
Customization
Managing Members
- Uploading and Updating Members
- Profile Screen
- Changing Passwords
- Defining Roles (for Districts)
- Defining Roles (for School Licensees)
- Defining Roles (for Education Ministries, RSAs, Consultants, Grantors, and Others)
Working with Data
- Participation Overview
- Downloading ARTI Data
- Downloading TIM-LP Data
- Downloading TIM-C Data
- Downloading TIM-O Data
- Downloading TIM-R Data
- Downloading TUPS Data
- Using TUPS, TIM-O, TIM-R, and TIM-LP Templates
2. TUPS
The Technology Uses and Perceptions Survey provides essential information for planning technology infrastructure and support and identifying the perceptions and PD needs of teachers.
- TUPS Intro
- Collection Frameworks
- TUPS Intro and Closing Text
- Customizing TUPS Sections and Items
- Accessing School or District TUPS Data
- TUPS Report Template
3. TIM-O / TIM-LP / TIM-R
These three tools are for classroom observation, lesson plan review, and teacher reflection.
Overview
Preparation
TIM-O
- TIM-O: Beginning an Observation
- TIM-O: Question-Based Method
- TIM-O: Matrix-Based Method
- TIM-O: Finishing an Observation
- TIM-O: Print or Share an Observation with a Teacher
- TIM-O: Editing Previous Observations
- TIM-O Report Templates
- Accessing School or District TIM-O Data
TIM-R
TIM-LP
4. TIM-C
The TIM-C allows a coach and client to document the goals, activities, progress, and outcomes of a coaching cycle.
5. ARTI
The ARTI tool provides a framework for teachers to design and conduct their own action research projects.
6. Report Tool
The Report Tool allows a school or district to create TIM-LP, TIM-O, TIM-R, or TUPS reports.
- Report Tool Intro
- Building a New Report
- View, Edit, or Delete Reports
- Interpreting TIM-O Report Data
7. Survey Tool
The Survey Tool allows a school or district to create internal or external surveys on new topics as needed.
- Survey Tool Intro
- Creating a New Internal Survey
- Creating a New Public Survey
- Adding Questions to Your Survey
- Customizing a Library Survey
- Viewing Survey Results
Need help?
Have a question?
Email us at TIM@fcit.us anytime. We want to help you get the most out of your TIM Tools account!
TIM Tools 7.5 Administration Guide
Building a New Report
A new report can be built using the Report Builder, located in the Report Tool drop down menu found within your TIM account’s Main Menu. This page guides you through the steps for creating a new report.
Note that the Report Tool displays only published data. TUPS surveys must be “Submitted” to be included in reporting. TUPS surveys that are still “In Progress” will not be included. TIM-O, TIM-R, and TIM-LP records must have the status of “Published” to be included in reporting. Records with the status of “Not Published” will not be included.
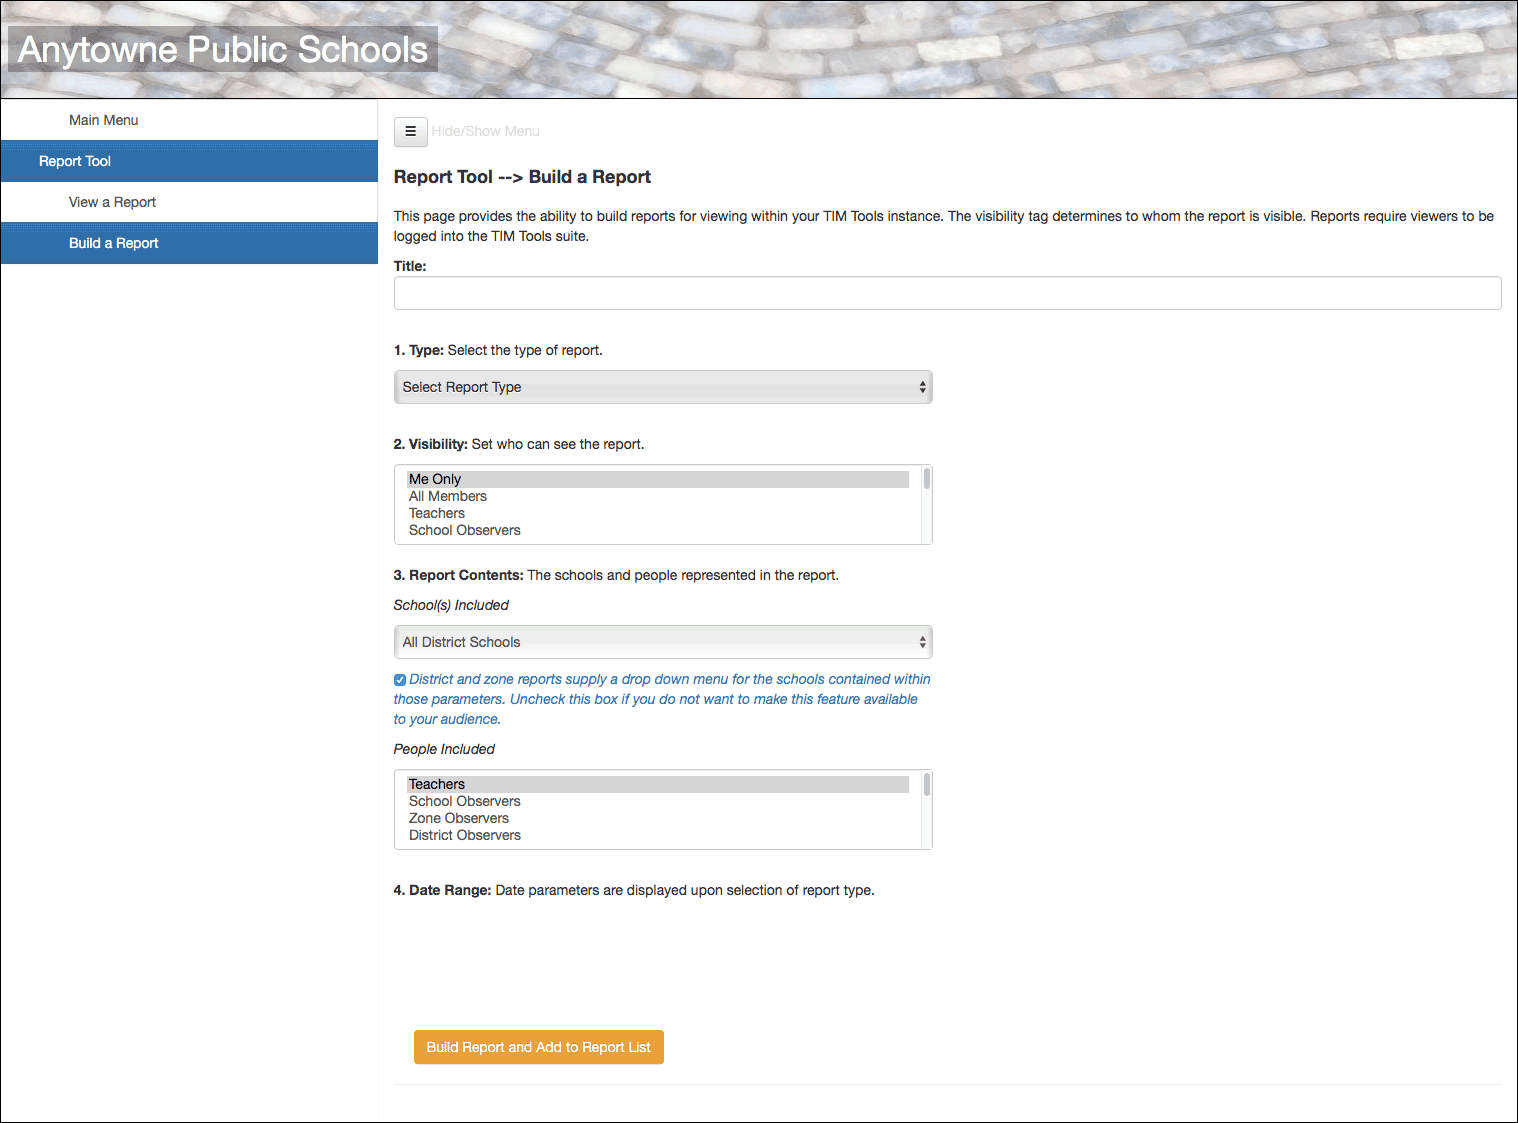
Figure 1. The Report Builder home page.
Title
When creating a new report, first name the report by using the Title text box.

Figure 2. Entering a title for the report.
1. Type
This option allows you to select the type of report you wish to create. When you click on the Type dropdown, you’ll be able to choose a TIM-LP, TIM-O, TIM-R, or a TUPS report.
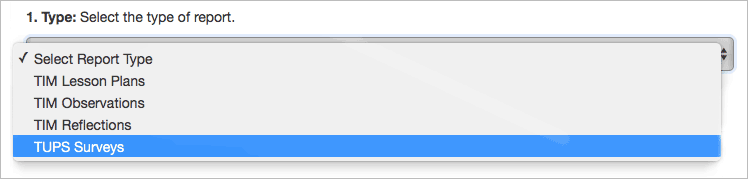
Figure 3. Selecting TUPS from the type of report dropdown menu.
2. Visibility
The Visibility dropdown enables you to set who can see the report. Your choices are “Me Only” (yourself), “All Members,” or any of the member roles or combination of roles. Use the Control key (WIN) or the Command key (MAC) to select more than one role.
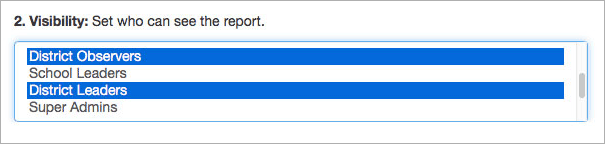
Figure 4. Visibility dropdown menu with District Observers and District Leaders selected as the audience.
3. Report Contents
The Schools dropdown menu gives you the ability to select which school you would like to be included in the report. You can select a specific school within your district, or set it to “All District Schools” so that every school is incorporated in the report.
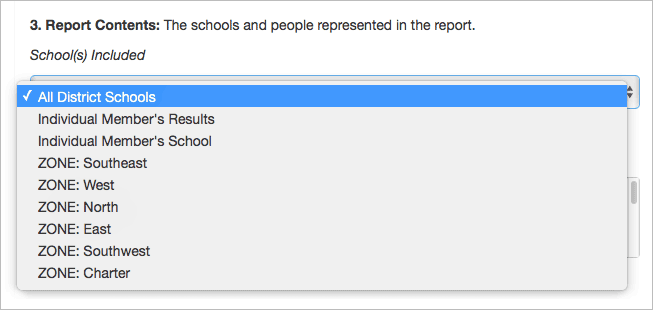
Figure 5. Schools dropdown menu as seen by a district leader.
School leaders will be able to create reports for their school. Zone leaders will be able to reports for their zone or any school within their zone. District leaders will be able to create reports for the entire district or any zone within their district. If “Individual Member’s Results” is selected from the Report Contents dropdown menu, then report viewers will see only their own personal results. If “Individual Member’s School” is selected, then report viewers will see only the aggregated results for their own school.
By default, district and zone reports include a dropdown menu that disaggregates the data by school. Uncheck the option box if you do not want data disaggregated by school available to the report’s audience.

Figure 6. Unchecking this box will not allow viewers of district or zone reports to view individual school data.
The People Included dropdown menu allows you to select which roles you want included in the report. Typically, you will want this set to Teachers. If you have assigned some classroom teachers as School Observers, then you should also select School Observers to capture the entire teaching faculty. Any role or combination of roles can be selected. There is also an option for All Members.
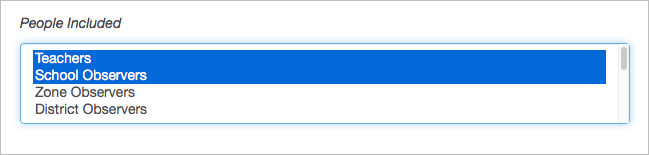
Figure 7. Selecting which roles to be included in the report.
4. Date Range
The Date Range is the final section before completing your report. Once you’ve selected the type of report you wish to create, the date range of available data for the selected report type will appear at the bottom of the screen. You can choose to leave the entire range selected or narrow the date range to include just a slice of the available time frame in your report. If you select an End Date in the future, the report will be updated with newly-added data each time the report is viewed.

Figure 8. Date range selector narrowed to the fall semester.
Once you’ve set all your Report preferences, click on the Build Report and Add to Report List button. Your report will then be added to the Report List and will be visible to whomever you specified in the Visibility setting.
Making His or Her Own Data Available to Each Member
If you wish, you can allow members in the system to see all of their own data using the Report Tool. This can include the TUPS and Reflections that the teacher has created as well as any Observations of teacher’s lessons or Reviews of the teacher’s lesson plans. Simply create a report for each of the tools (TUPS, TIM-O, TIM-R, or TIM-LP) you are actively using. Set Visibility to “All Members,” set Report Contents to “Individual Member’s Results,” and set People Included to “All Members.” If you want members to see new results on an ongoing basis, change the End Date to a point in the future. The resulting report will be available to every member, but each member viewing the report will see only his or her own data.
Legacy Reports
If you created reports during the 2017-2018 school year with the beta version of the Report Tool in TIM Tools 5, your legacy reports will still be available in TIM Tools 6. If you edit a legacy report, it will be saved as a version 6 report. The current Report Tool has much more flexibility regarding roles than the beta version had.