Menu
1. TIM Tools Admin Center
The Admin Center provides for management of the TIM Tools suite of applications.
Overview
Getting Started
- Admin Center Access
- Admin Center Dashboard
- Managing Zones (for Districts)
- Managing Zones (for Regional Service Agencies)
- Managing Zones (for Education Ministries, Consultants, Grantors, and Others)
- Managing Schools
Customization
Managing Members
- Uploading and Updating Members
- Profile Screen
- Changing Passwords
- Defining Roles (for Districts)
- Defining Roles (for School Licensees)
- Defining Roles (for Education Ministries, RSAs, Consultants, Grantors, and Others)
Working with Data
- Participation Overview
- Downloading ARTI Data
- Downloading TIM-LP Data
- Downloading TIM-C Data
- Downloading TIM-O Data
- Downloading TIM-R Data
- Downloading TUPS Data
- Using TUPS, TIM-O, TIM-R, and TIM-LP Templates
2. TUPS
The Technology Uses and Perceptions Survey provides essential information for planning technology infrastructure and support and identifying the perceptions and PD needs of teachers.
- TUPS Intro
- Collection Frameworks
- TUPS Intro and Closing Text
- Customizing TUPS Sections and Items
- Accessing School or District TUPS Data
- TUPS Report Template
3. TIM-O / TIM-LP / TIM-R
These three tools are for classroom observation, lesson plan review, and teacher reflection.
Overview
Preparation
TIM-O
- TIM-O: Beginning an Observation
- TIM-O: Question-Based Method
- TIM-O: Matrix-Based Method
- TIM-O: Finishing an Observation
- TIM-O: Print or Share an Observation with a Teacher
- TIM-O: Editing Previous Observations
- TIM-O Report Templates
- Accessing School or District TIM-O Data
TIM-R
TIM-LP
4. TIM-C
The TIM-C allows a coach and client to document the goals, activities, progress, and outcomes of a coaching cycle.
5. ARTI
The ARTI tool provides a framework for teachers to design and conduct their own action research projects.
6. Report Tool
The Report Tool allows a school or district to create TIM-LP, TIM-O, TIM-R, or TUPS reports.
- Report Tool Intro
- Building a New Report
- View, Edit, or Delete Reports
- Interpreting TIM-O Report Data
7. Survey Tool
The Survey Tool allows a school or district to create internal or external surveys on new topics as needed.
- Survey Tool Intro
- Creating a New Internal Survey
- Creating a New Public Survey
- Adding Questions to Your Survey
- Customizing a Library Survey
- Viewing Survey Results
Need help?
Have a question?
Email us at TIM@fcit.us anytime. We want to help you get the most out of your TIM Tools account!
TIM Tools 7.5 Administration Guide
ARTI Introduction
As teachers increase integration of technology in their classrooms, they begin to take more responsibility for ensuring its effective use with students. The Action Research for Technology Integration tool provides a framework for teachers to design and conduct their own action research projects. ARTI guides teachers through the five basic steps of an action research project including: identification of a question, description of the context, data collection, analysis, and the creation of findings. In each step, ARTI guides teachers in recording the necessary details that are then saved to a central database for each instance of TIM-Tools. The following describes how teachers use ARTI.
Select the Action Research for Technology Integration (ARTI) from the TIM Tools main menu. The ARTI Dashboard will open. You will be presented with a list of all your existing proposals.
 Figure 1. ARTI Dashboard.
To edit an existing proposal, click the Edit button. To view a PDF of the proposal, click the PDF button. To delete an existing proposal, click the Delete button. The Published / Not Published button will toggle the state of the proposal. Unpublished proposals are available only to the author.
To begin a new proposal, select Create New Proposal from the ARTI menu.
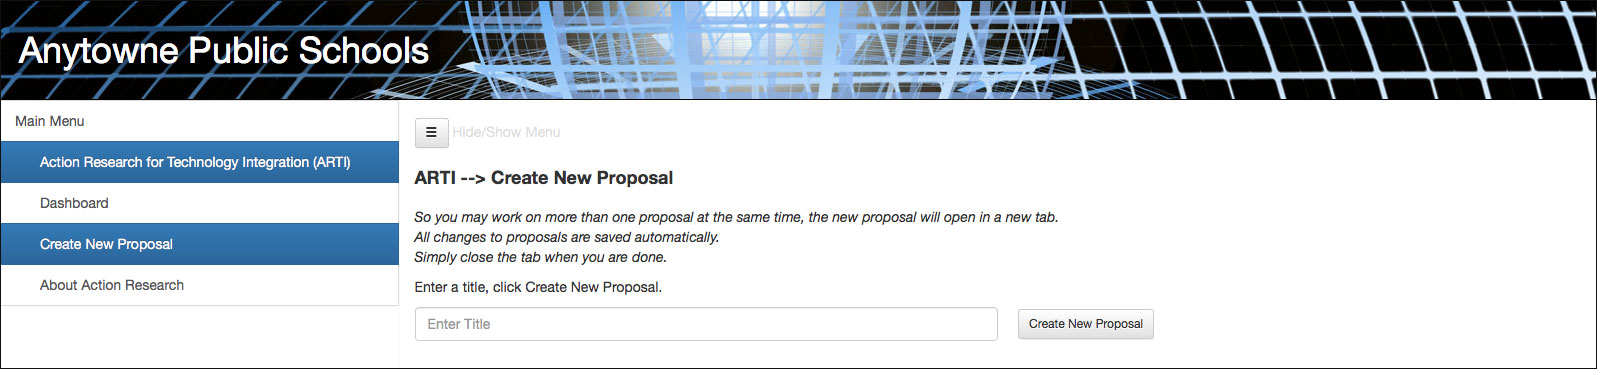 Figure 2. Create New Proposal window.
To create a new proposal, enter a title in the text field and click the Create New Proposal button. You will be taken to the Introduction window.
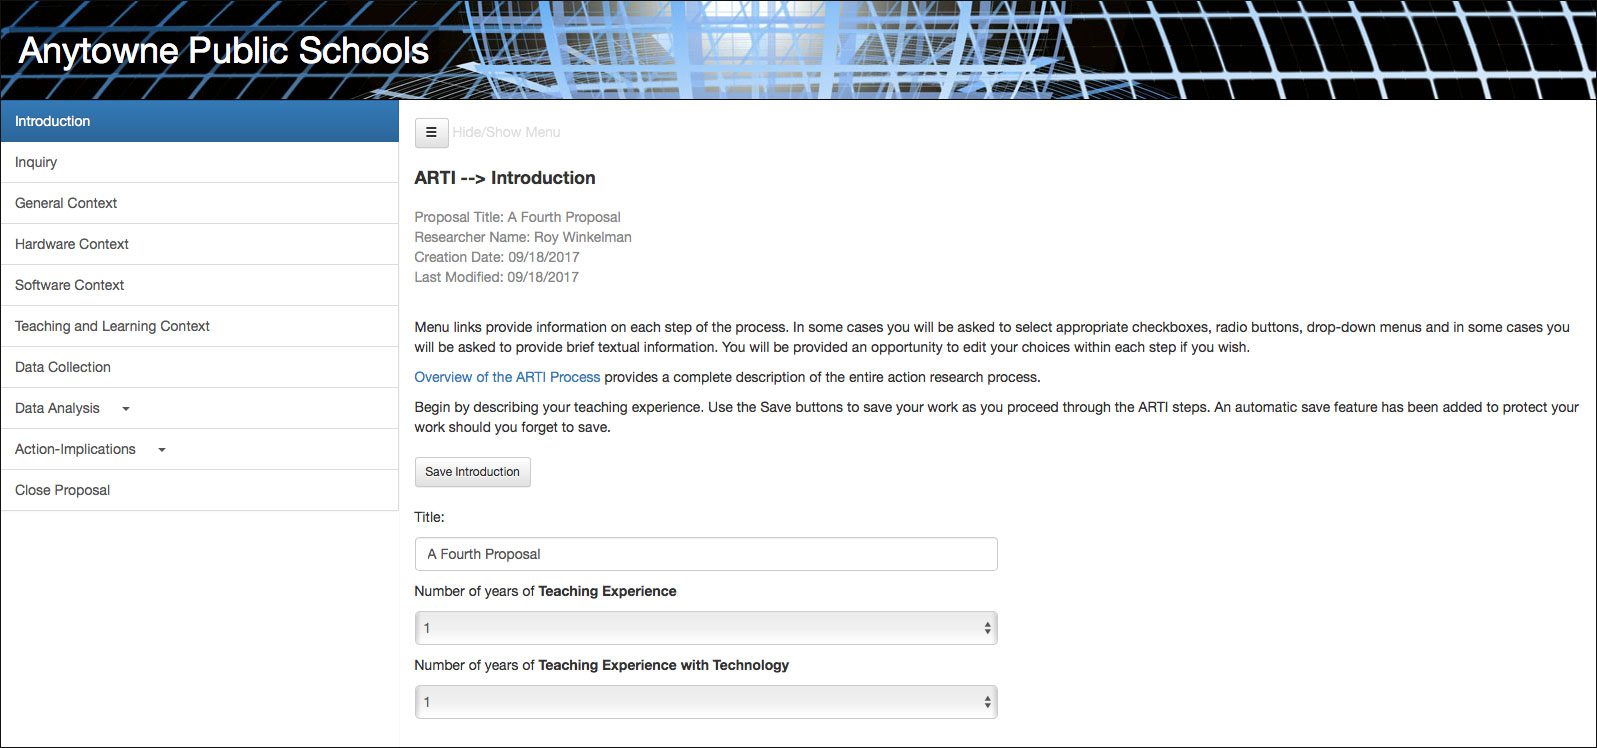 Figure 3. Introduction window.
The Introduction window offers a link to an Overview of the Action Research Process and the opportunity to indicate the user’s years of teaching experience, including years using technology. When you’ve entered this information, select Inquiry from the ARTI menu to begin the five steps of the action research process.
1. Identification of the Action Research Inquiry
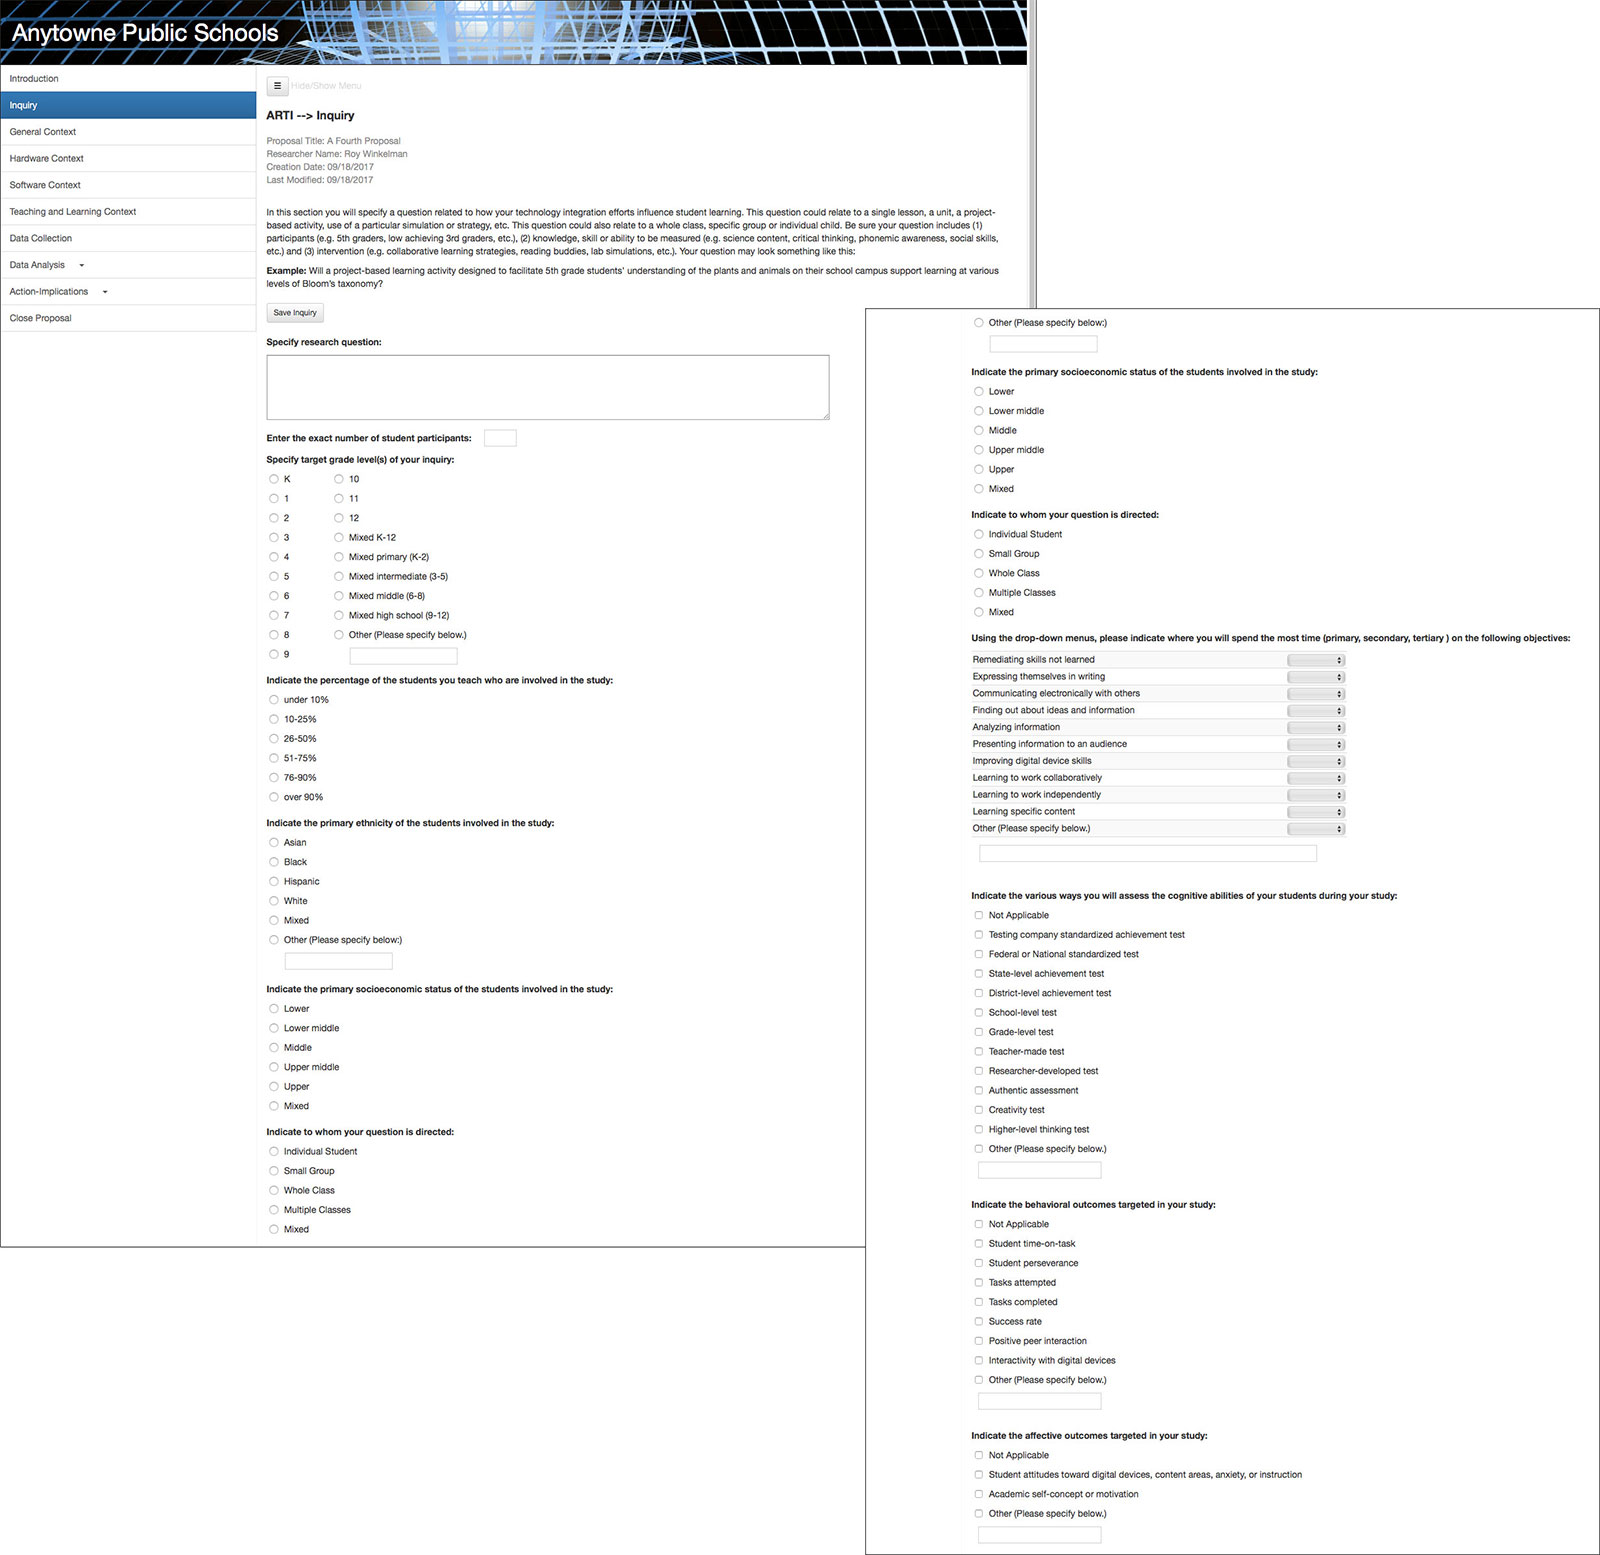 Figure 4. Inquiry window.
In the Inquiry section, teachers specify a question related to how their technology integration efforts influence student learning. This question could relate to a single lesson, a unit, a project-based activity, use of a particular simulation or strategy, etc. This question could also relate to a whole class, specific group or individual child. The section also provides the means for identifying the target students, the focus of classroom efforts, methods of assessment, and behavioral and affective outcomes. When you have completed this section, select General Context from the ARTI menu.
2. Identification of the Classroom Context
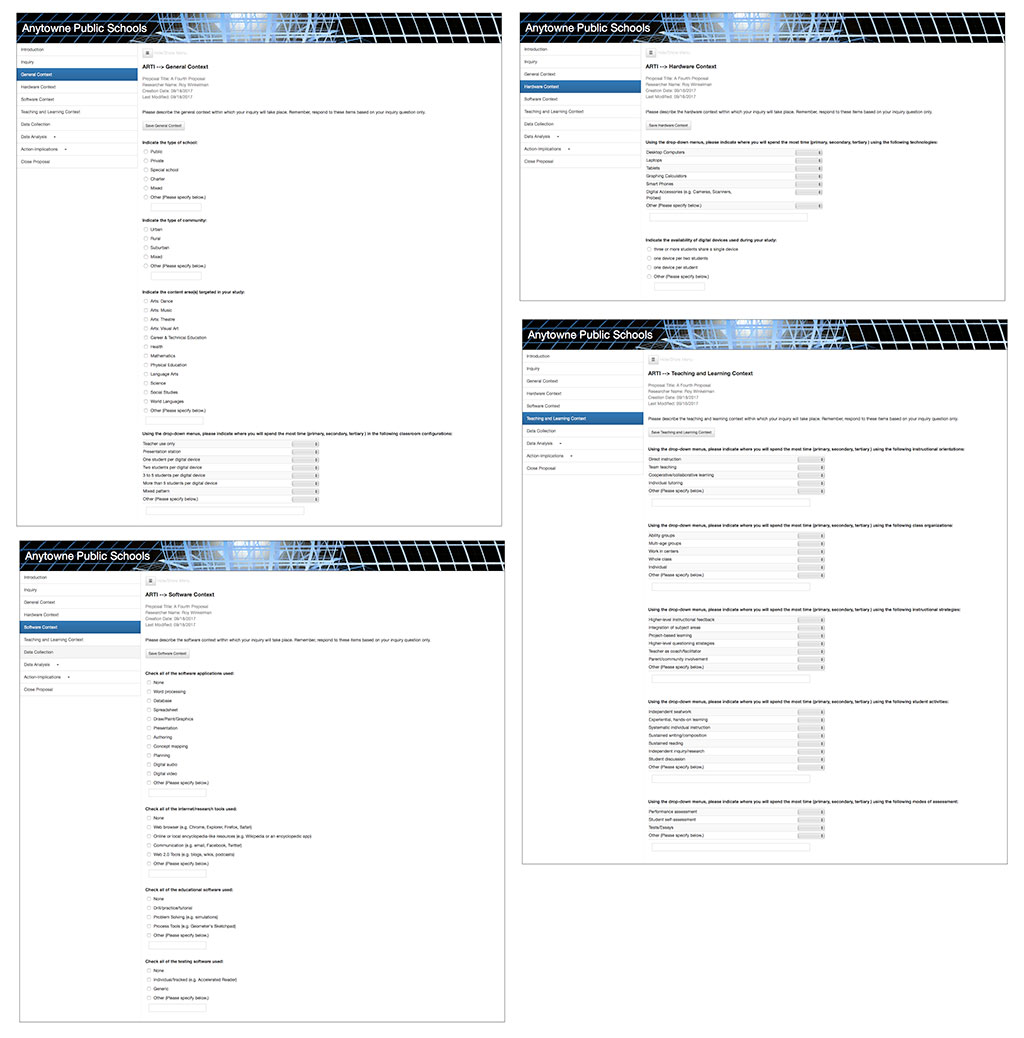 Figure 5. Answering general questions in the four Context windows.
The next four menu items capture general information about the classroom context, hardware and software used, and teaching and learning questions. Check boxes, radio buttons, and drop-down menus provide guidance and a controlled vocabulary for describing the context. Work through these four windows one at a time. When finished with all four Context windows, select Data Collection from the ARTI menu.
3. Data Collection Strategies
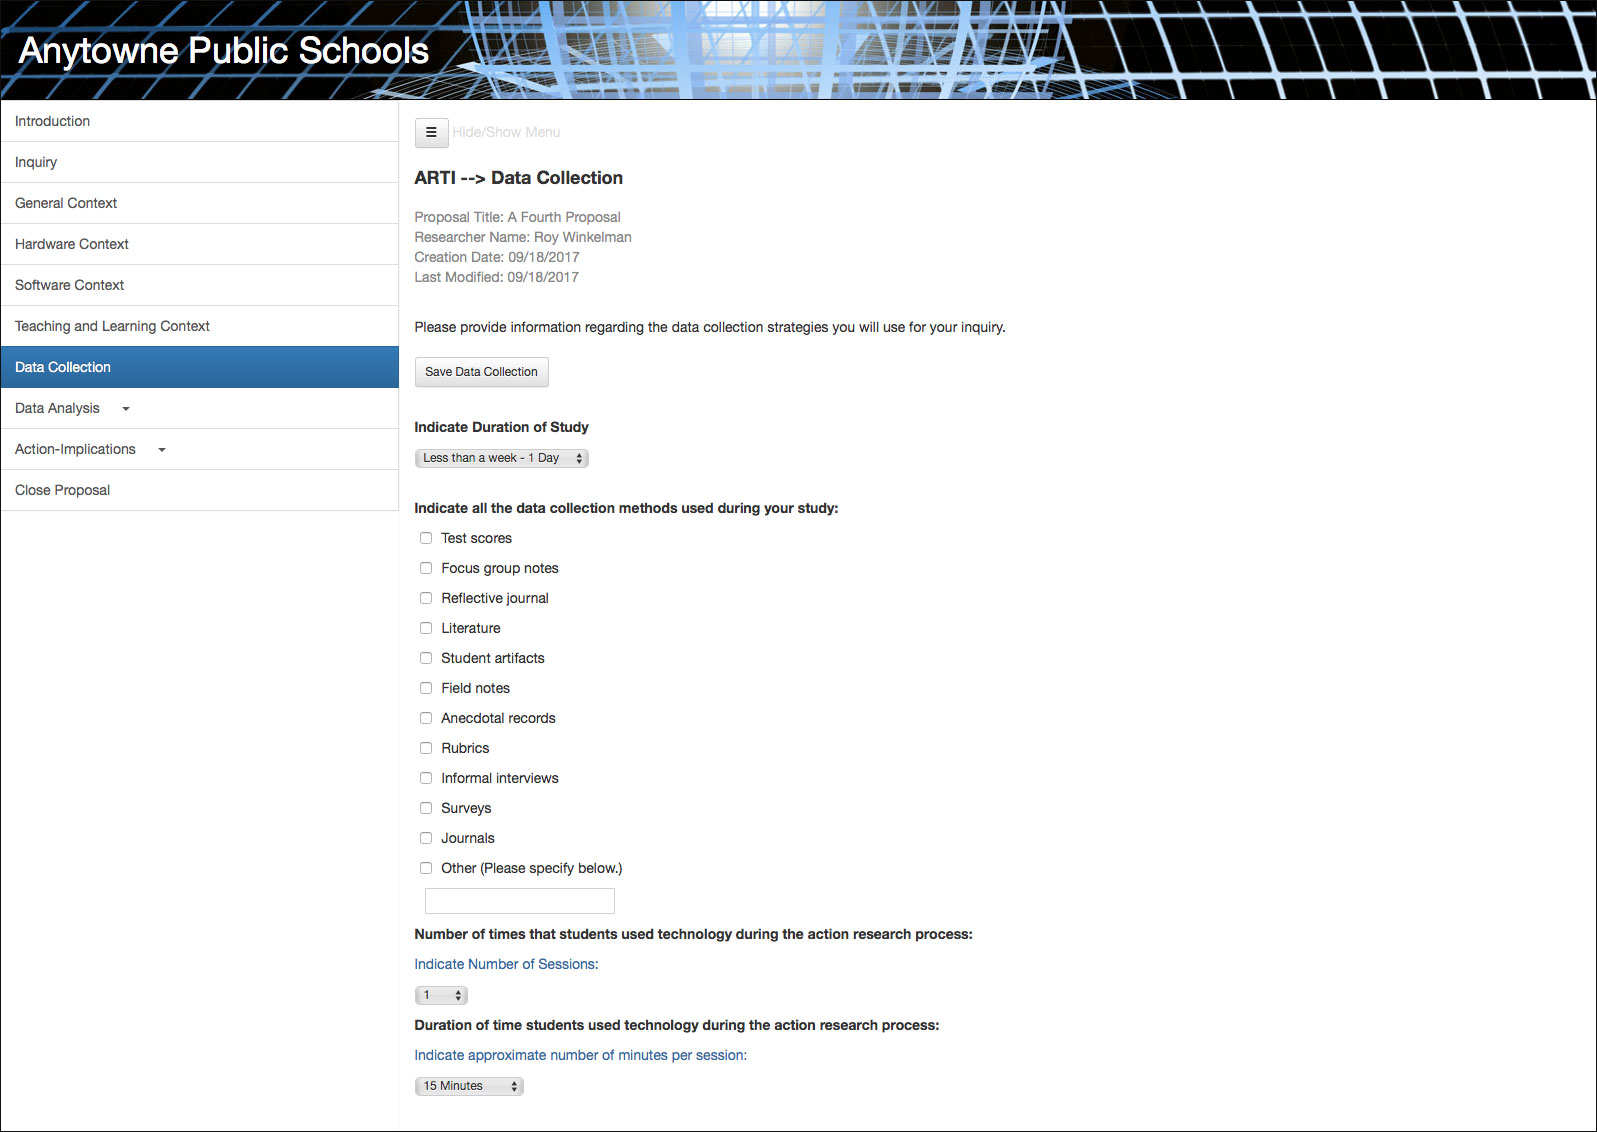 Figure 6. Data Collection window.
This section provides a menu of data collection methods for teachers to consider for use in their inquiries. When finished, click Data Analysis.
4. Data Analysis
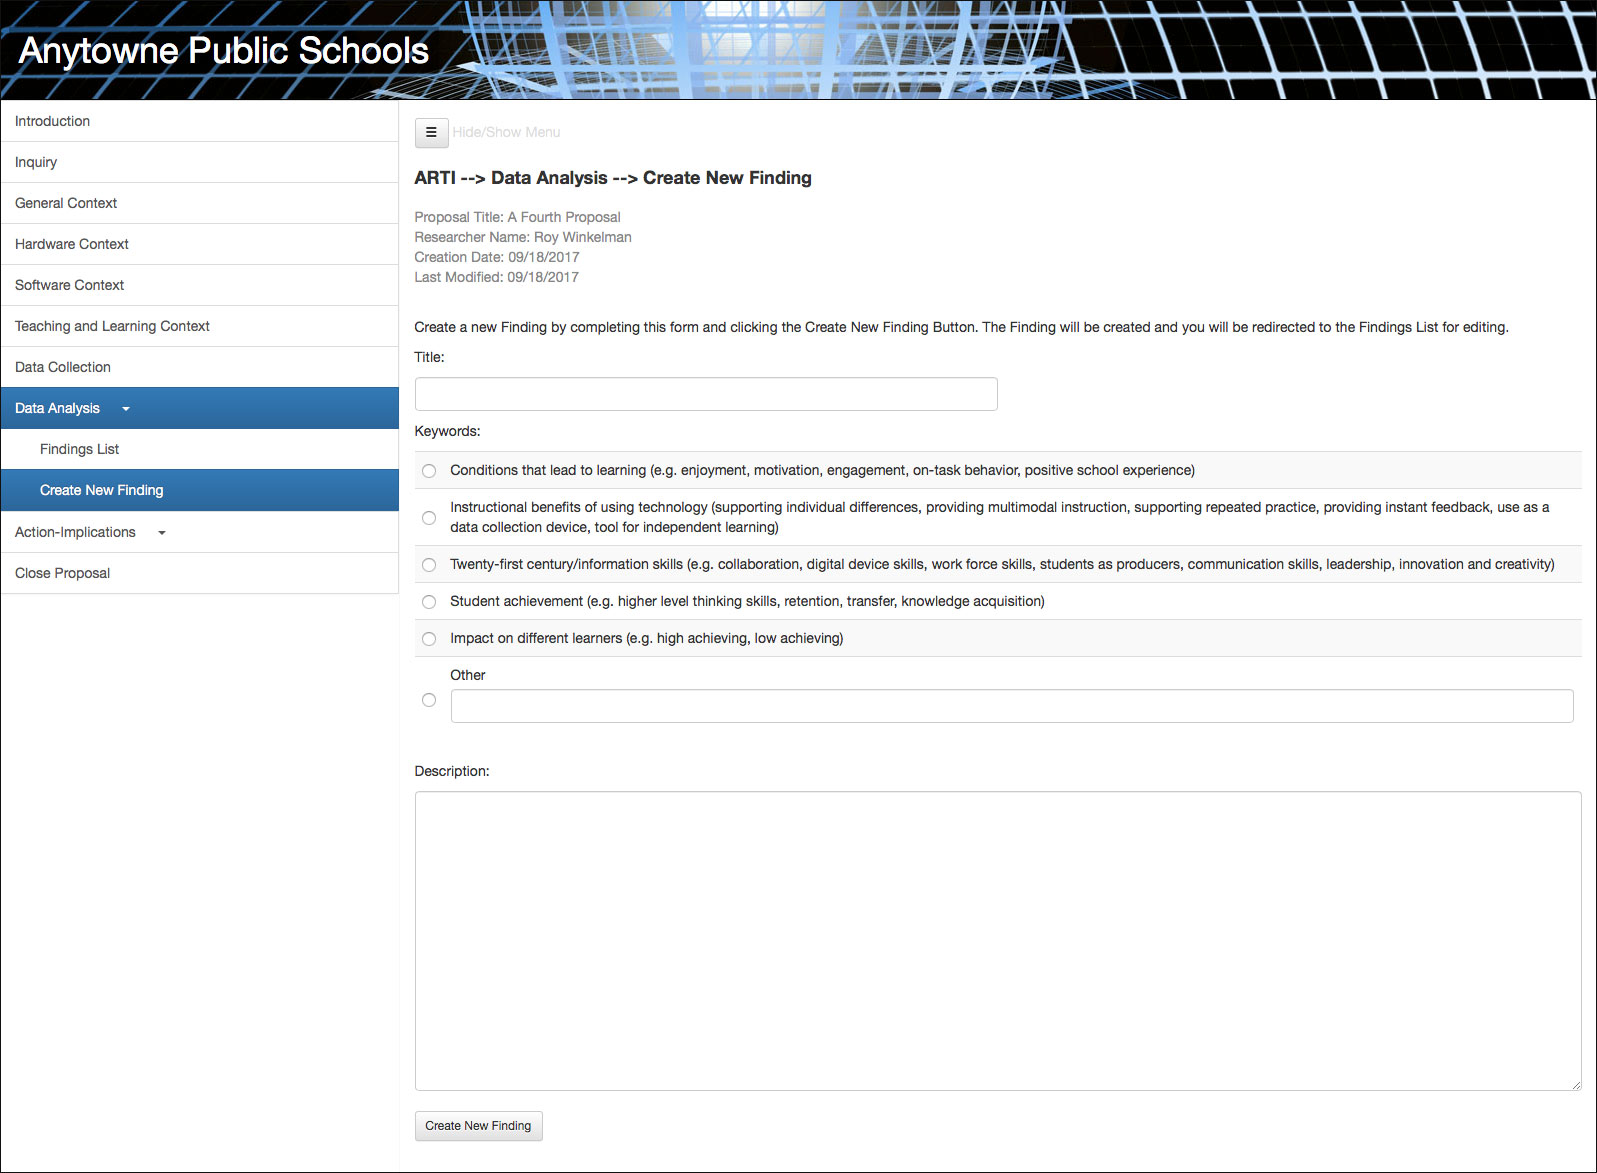 Figure 7: Create New Finding window.
In this section, teachers synthesize and interpret their data to formulate findings. For each finding they create, ARTI records a title, keywords/phrases, and a description. Each research project can lead to several findings.
Once you have formulated a finding, click on the Create New Finding button and enter a description and keywords. The finding will be created and displayed in the Fidings list below. You can edit or revise findings at any time.
5. Implications and Actions
 Figure 8. Describing implications or actions on the Implications and Actions tab.
In the last section, teachers are directed to create implications or actions based on their findings in the previous section. As with findings, each implication or action has a title, keywords/phrases, and a description of the implication or action. Click the Create New Implication/Action button to begin. Existing implications/actions can be edited or deleted by clicking the appropriate links next to the titles.