Menu
1. TIM Tools Admin Center
The Admin Center provides for management of the TIM Tools suite of applications.
Overview
Getting Started
- Admin Center Access
- Admin Center Dashboard
- Managing Zones (for Districts)
- Managing Zones (for Regional Service Agencies)
- Managing Zones (for Education Ministries, Consultants, Grantors, and Others)
- Managing Schools
Customization
Managing Members
- Uploading and Updating Members
- Profile Screen
- Changing Passwords
- Defining Roles (for Districts)
- Defining Roles (for School Licensees)
- Defining Roles (for Education Ministries, RSAs, Consultants, Grantors, and Others)
Working with Data
- Participation Overview
- Downloading ARTI Data
- Downloading TIM-LP Data
- Downloading TIM-C Data
- Downloading TIM-O Data
- Downloading TIM-R Data
- Downloading TUPS Data
- Using TUPS, TIM-O, TIM-R, and TIM-LP Templates
2. TUPS
The Technology Uses and Perceptions Survey provides essential information for planning technology infrastructure and support and identifying the perceptions and PD needs of teachers.
- TUPS Intro
- Collection Frameworks
- TUPS Intro and Closing Text
- Customizing TUPS Sections and Items
- Accessing School or District TUPS Data
- TUPS Report Template
3. TIM-O / TIM-LP / TIM-R
These three tools are for classroom observation, lesson plan review, and teacher reflection.
Overview
Preparation
TIM-O
- TIM-O: Beginning an Observation
- TIM-O: Question-Based Method
- TIM-O: Matrix-Based Method
- TIM-O: Finishing an Observation
- TIM-O: Print or Share an Observation with a Teacher
- TIM-O: Editing Previous Observations
- TIM-O Report Templates
- Accessing School or District TIM-O Data
TIM-R
TIM-LP
4. TIM-C
The TIM-C allows a coach and client to document the goals, activities, progress, and outcomes of a coaching cycle.
5. ARTI
The ARTI tool provides a framework for teachers to design and conduct their own action research projects.
6. Report Tool
The Report Tool allows a school or district to create TIM-LP, TIM-O, TIM-R, or TUPS reports.
- Report Tool Intro
- Building a New Report
- View, Edit, or Delete Reports
- Interpreting TIM-O Report Data
7. Survey Tool
The Survey Tool allows a school or district to create internal or external surveys on new topics as needed.
- Survey Tool Intro
- Creating a New Internal Survey
- Creating a New Public Survey
- Adding Questions to Your Survey
- Customizing a Library Survey
- Viewing Survey Results
Need help?
Have a question?
Email us at TIM@fcit.us anytime. We want to help you get the most out of your TIM Tools account!
TIM Tools 7.5 Administration Guide
Managing Schools
The Schools tab of the Admin Center allows you to manage schools within a district TIM Tools account. There are three sections under the Schools tab:
Section 1: Alphabetical List
Use this page to make any changes to the name or identifier of a school, change the zone of a school, or delete a school. A PDF report of the individual school roster and activity is also available.
Schools are displayed in alphabetical order and with their system ID and external identifier. The system ID is the internal identification code used by TIM Tools. The external identifier is any alphanumeric code your own system uses.
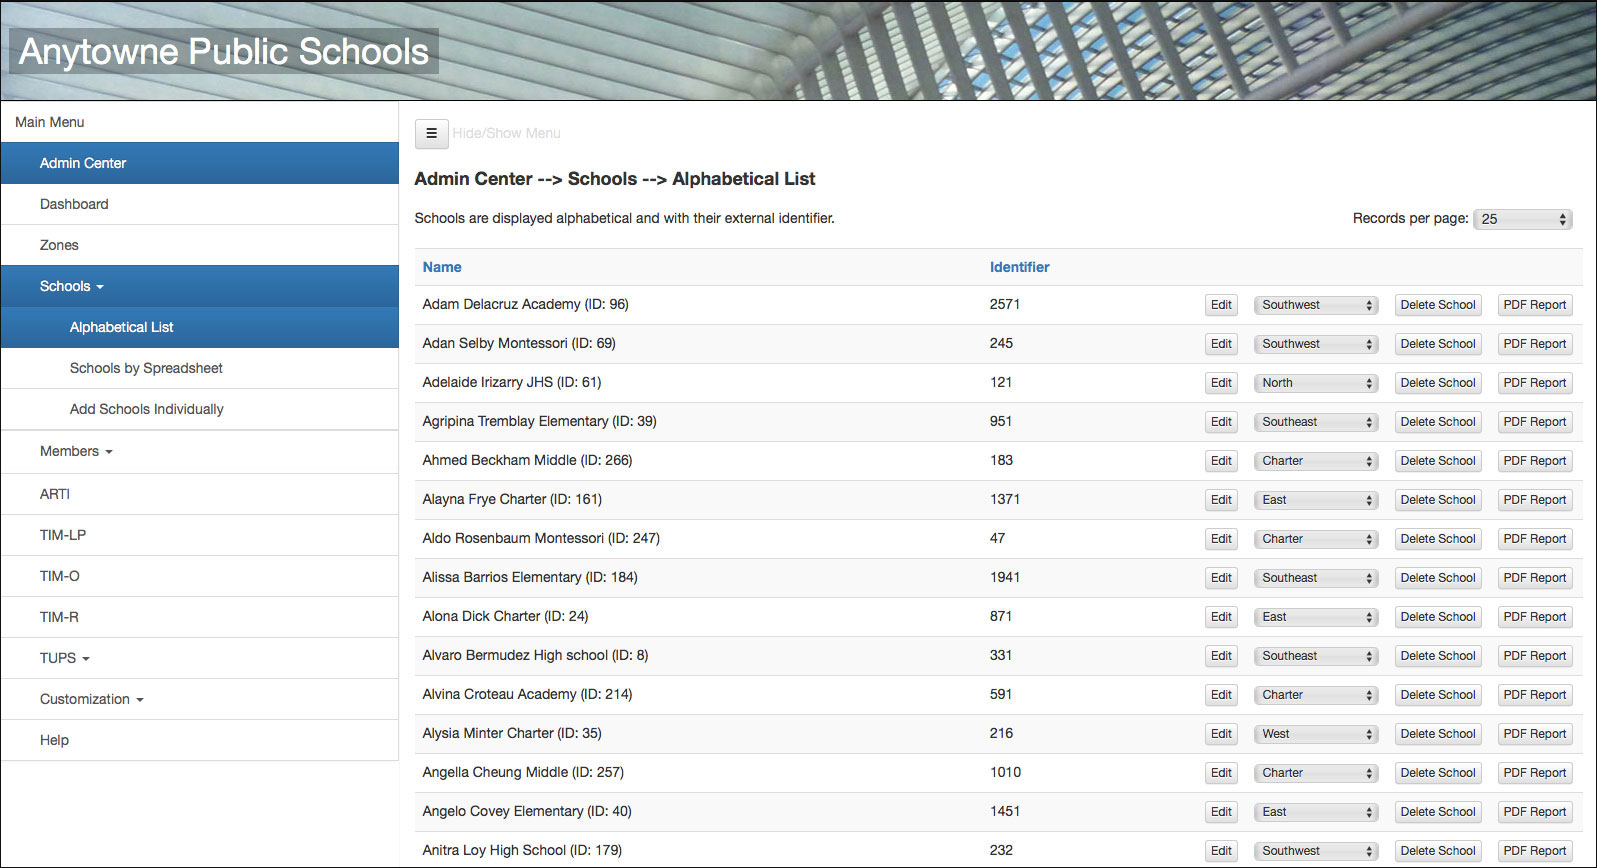 Figure 1. Schools tab showing an alphabetical list of current schools.
To change the school name or the related identifier, first click the Edit button. You will then see a form where you can change the name of the school or the unique identifier for the school. You may want to match the unique identifiers to the codes you use in other district systems. The identifier can be any alphanumeric code you wish. It must be unique, however. If you try to assign the same identifier to a second school, you will receive an alert that the identifier is already in use. When you have made the desired changes, click the Save Changes button and you will be returned to the Alphabetical List.
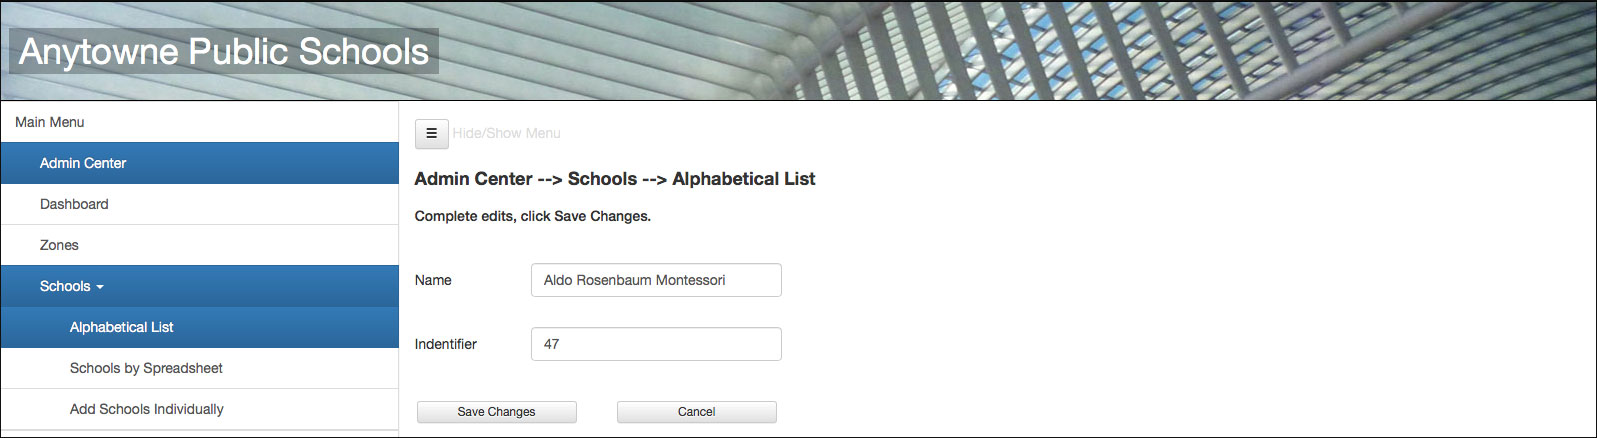 Figure 2. School edit window.
To change the Zone of a school, use the dropdown menu to select the new zone.
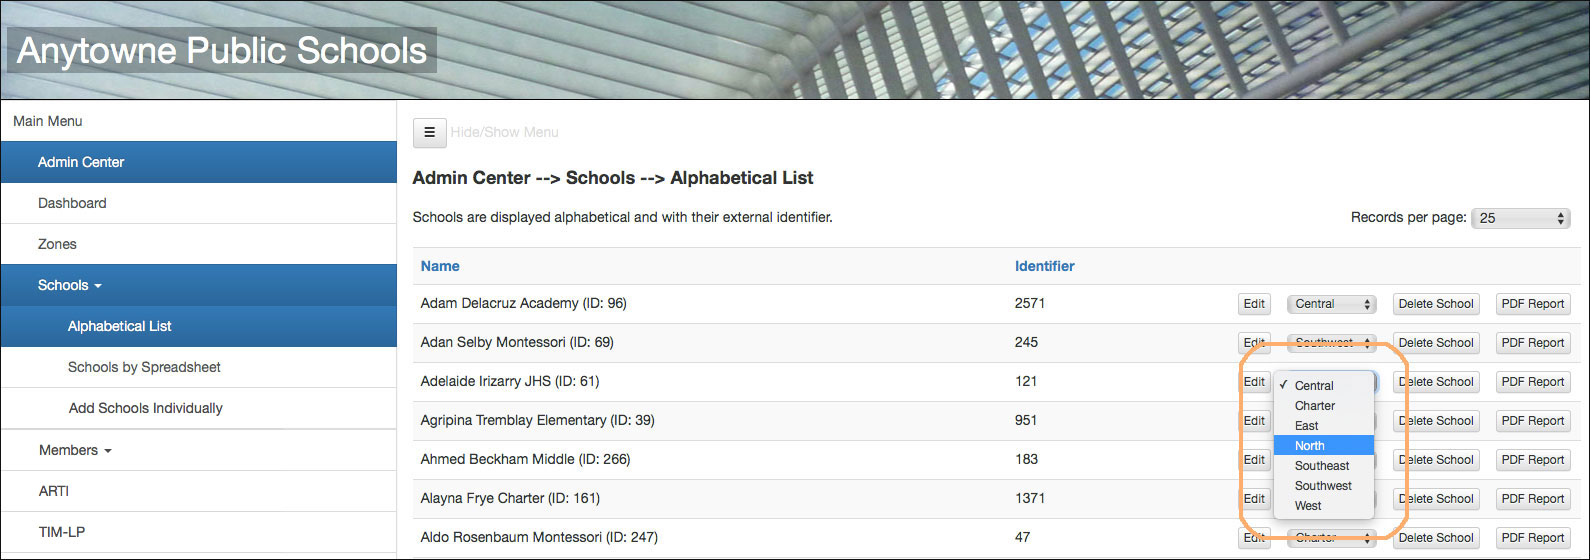 Figure 3. Reassigning a school to a different zone.
Use the Delete School button to delete a school.
Click the PDF Report Button to generate a PDF file of all the data from a particular school.
If you have a large district, you may find it convenient to set the Records per Page setting to a higher number.
Section 2: Schools by Spreadsheet
If you have many school changes to make, you may find it easier to make those changes via spreadsheet instead of entering each change individually.
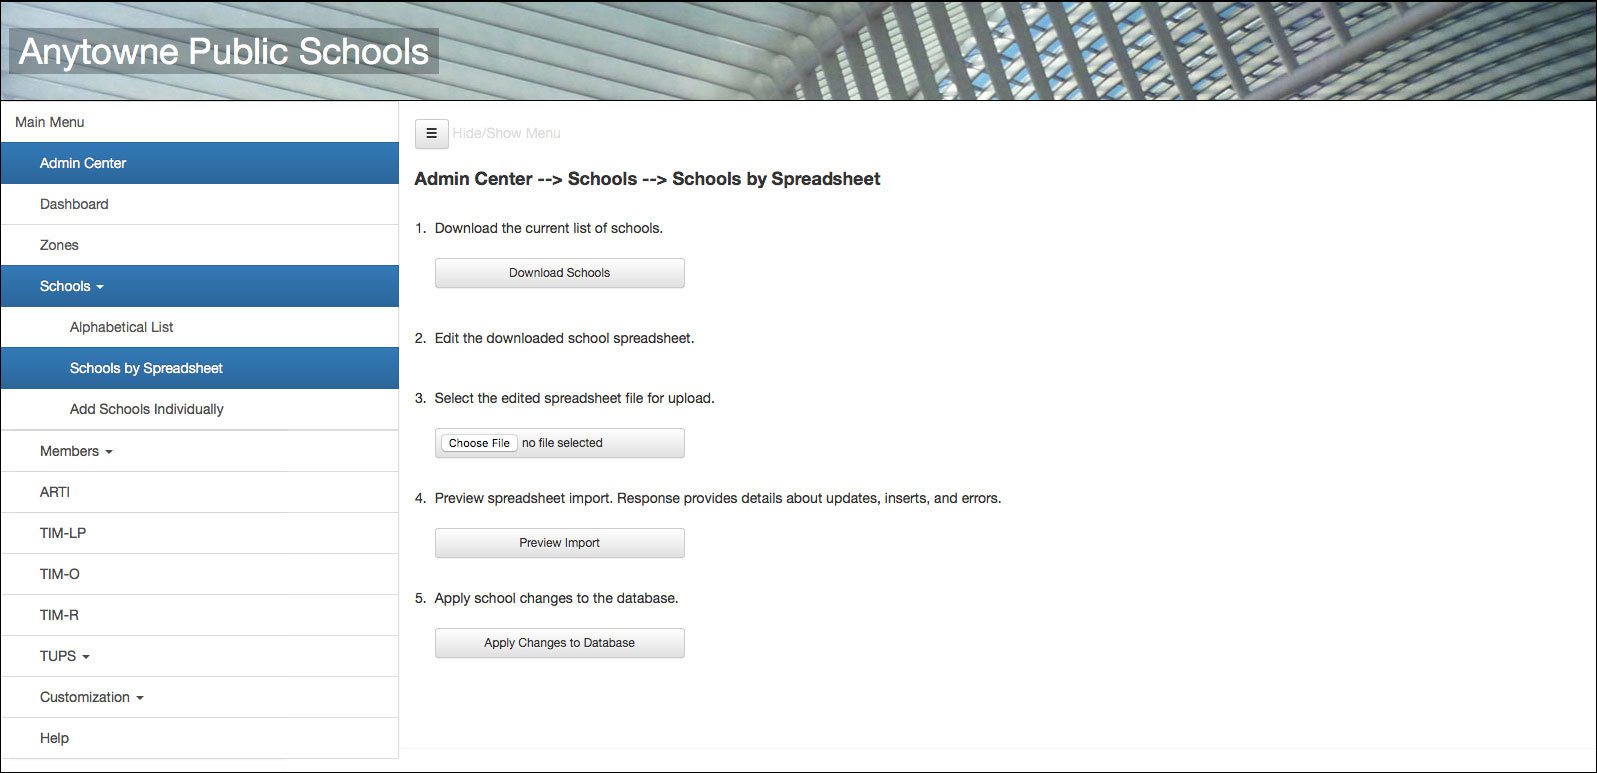 Figure 4. The Schools by Spreadsheet section.
1. First, use the Download Schools button to download your current list of schools. When you open the spreadsheet in Excel you’ll find four columns labeled: Your Identifier, School Name, Zone ID, and System ID.
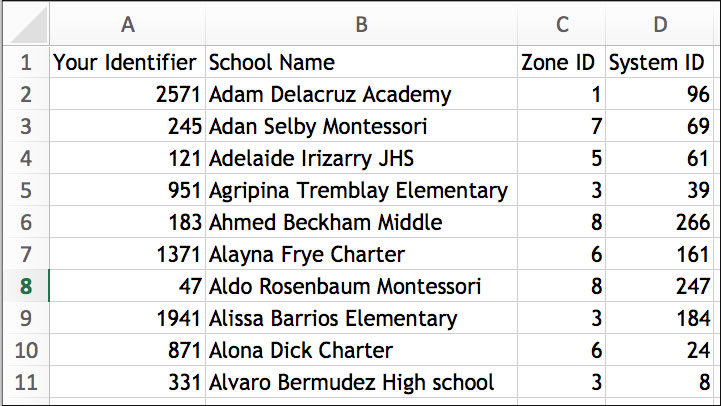
Figure 5. Downloaded spreadsheet.
2. Make any desired changes to the School Name or the Your Identifier columns, keeping in mind that each cell in the Your Identifier column must be a unique alphanumeric entry. Add each new school in its own row. Do not edit anything in column D (System ID). Save your spreadsheet somewhere easy to find on your computer.
3. Click the Choose File button and select your revised spreadsheet.
4. Click the Preview Import button. A report will display indicating each change. At this point no data has actually been changed in the database.
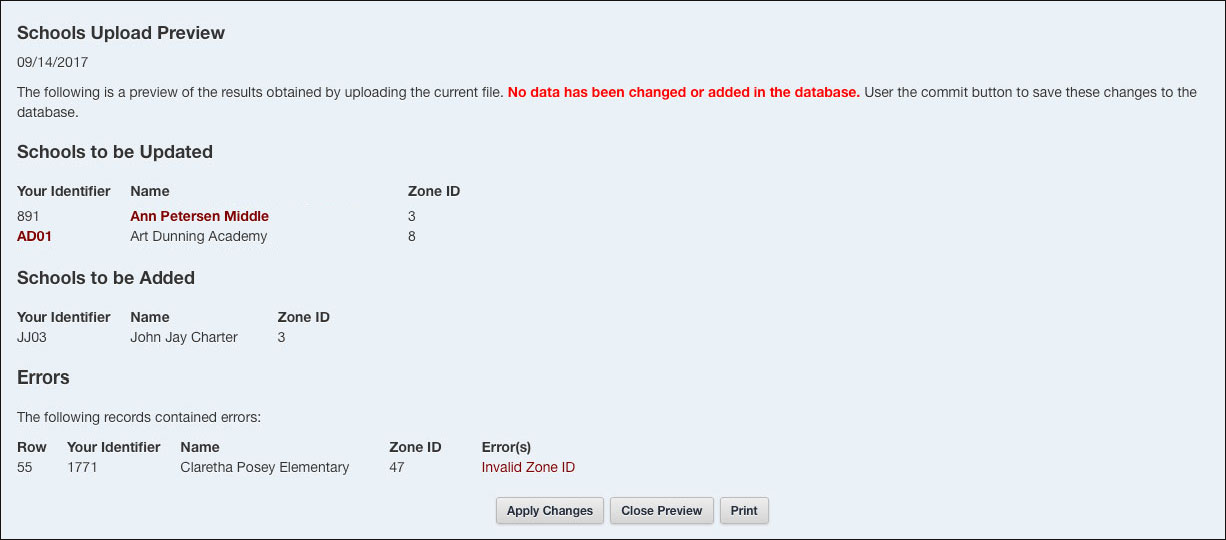
Figure 6. Schools Upload Preview. The preview shows that a correction has been made to the name Ann Petersen Middle, a change made to the identifier for Art Dunning Academy, and the John Jay Charter school successfully added. The report also shows one error. In changing Claretha Posel Elementary from zone 4 to zone 7, the administrator accidently entered “47” into the spreadsheet. Since the district did not happen to have a zone 47, an error was displayed.
5. Apply the changes. You can apply the changes from within the School Upload Preview window by clicking on the Apply Changesbutton or you can close the Preview window and apply the changes by clicking the Apply Changes to Database button.
TIP: Be sure to indicate a zone for each school, even if you did not create any special zones of your own (in that case, just indicate the default zone ID for each school). The default zone ID will always be 1. A SCHOOL WITHOUT A ZONE ID INDICATED WILL NOT BE IMPORTED.
Section 3: Add Schools Individually
If you have only a few changes to make to your schools, it may be easier to make them in the Add Schools Individually window rather than using the spreadsheet method. Simply enter a name for the school. The system will automatically create a unique ID number for each school.
OPTIONAL: If you would prefer to use your own school ID, you can add your unique identifier where indicated. For example you may wish to use “CCHS” as your ID for “Center City High School.” Large districts usually have their own school codes that they would prefer to use rather than have the system generate a numeric ID.
Then select the zone from the dropdown menu and click the Add Individual School button. The update takes place immediately and you will see a confirmation message that the school has been added.
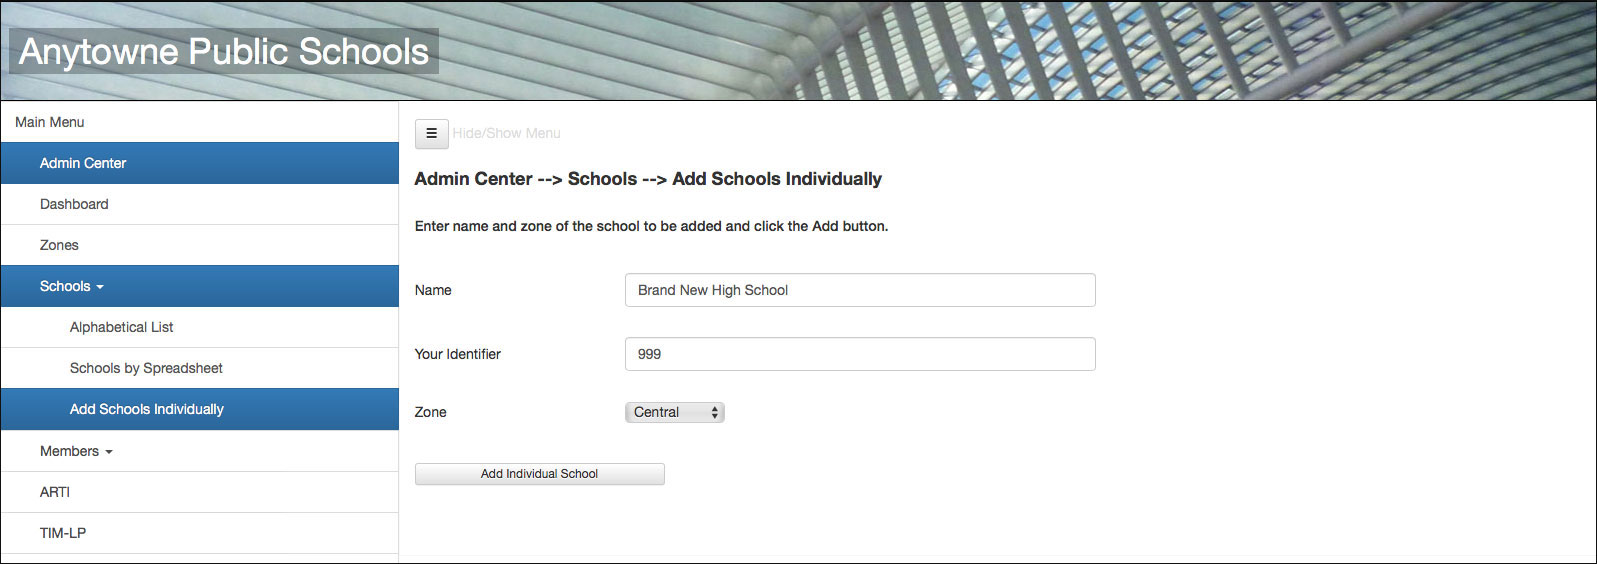 Figure 6. Adding a school individually. “Brand New High” has been entered with an identifier of “999”.
Members without School Assignments
It is not necessary to assign each member to a school in the system. You may find, however, that it is convenient for your purposes to create “schools” for non-school staff. A district might want to create a “Central Office” school and assign district personnel to that school. A large district might want to create an administrative “school” within each zone, for example, a “North Zone Office” and a “South Zone Office.”