Menu
1. TIM Tools Admin Center
The Admin Center provides for management of the TIM Tools suite of applications.
Overview
Getting Started
- Admin Center Access
- Admin Center Dashboard
- Managing Zones (for Districts)
- Managing Zones (for Regional Service Agencies)
- Managing Zones (for Education Ministries, Consultants, Grantors, and Others)
- Managing Schools
Customization
Managing Members
- Uploading and Updating Members
- Profile Screen
- Changing Passwords
- Defining Roles (for Districts)
- Defining Roles (for School Licensees)
- Defining Roles (for Education Ministries, RSAs, Consultants, Grantors, and Others)
Working with Data
- Participation Overview
- Downloading ARTI Data
- Downloading TIM-LP Data
- Downloading TIM-C Data
- Downloading TIM-O Data
- Downloading TIM-R Data
- Downloading TUPS Data
- Using TUPS, TIM-O, TIM-R, and TIM-LP Templates
2. TUPS
The Technology Uses and Perceptions Survey provides essential information for planning technology infrastructure and support and identifying the perceptions and PD needs of teachers.
- TUPS Intro
- Collection Frameworks
- TUPS Intro and Closing Text
- Customizing TUPS Sections and Items
- Accessing School or District TUPS Data
- TUPS Report Template
3. TIM-O / TIM-LP / TIM-R
These three tools are for classroom observation, lesson plan review, and teacher reflection.
Overview
Preparation
TIM-O
- TIM-O: Beginning an Observation
- TIM-O: Question-Based Method
- TIM-O: Matrix-Based Method
- TIM-O: Finishing an Observation
- TIM-O: Print or Share an Observation with a Teacher
- TIM-O: Editing Previous Observations
- TIM-O Report Templates
- Accessing School or District TIM-O Data
TIM-R
TIM-LP
4. TIM-C
The TIM-C allows a coach and client to document the goals, activities, progress, and outcomes of a coaching cycle.
5. ARTI
The ARTI tool provides a framework for teachers to design and conduct their own action research projects.
6. Report Tool
The Report Tool allows a school or district to create TIM-LP, TIM-O, TIM-R, or TUPS reports.
- Report Tool Intro
- Building a New Report
- View, Edit, or Delete Reports
- Interpreting TIM-O Report Data
7. Survey Tool
The Survey Tool allows a school or district to create internal or external surveys on new topics as needed.
- Survey Tool Intro
- Creating a New Internal Survey
- Creating a New Public Survey
- Adding Questions to Your Survey
- Customizing a Library Survey
- Viewing Survey Results
Need help?
Have a question?
Email us at TIM@fcit.us anytime. We want to help you get the most out of your TIM Tools account!
TIM Tools 7.5 Administration Guide
Admin Center Introduction
This page is a preview of the contents of the following pages in the Admin Center section.
The TIM Tools Admin Center gives administrators the ability to upload lists of schools and members, assign observers, administer member passwords, and generate reports. The district version also allows the grouping of schools into zones for assigning administrative and observation responsibilities. The Admin Center provides great flexibility in how the TIM-O is used. One school might limit observer status to upper-level administrators. Another school might include department heads and team leaders as observers. Still another might grant observer status to all faculty members so that they can conduct peer observations. Reports of all completed observations can be viewed in the Admin Center or downloaded as a spreadsheet. Pasting the raw downloaded data into specially-designed templates instantly generates extensive reports that identify needs, provide insight into the current levels of technology integration, and pinpoint the most pressing (and promising) professional development topics.
TIM Tools offers a great deal of flexibility in assigning permissions to member roles. Most of the screenshots in this guide display the Super Admin’s view of the page. Users assigned to other roles may see fewer administrative options on many of the screens.
You needn’t get bogged down in the details of this section. Remember that there is plenty of guidance within the Admin Center itself and, of course, we are always ready so assist clients in setting up and managing their TIM Tools instance.
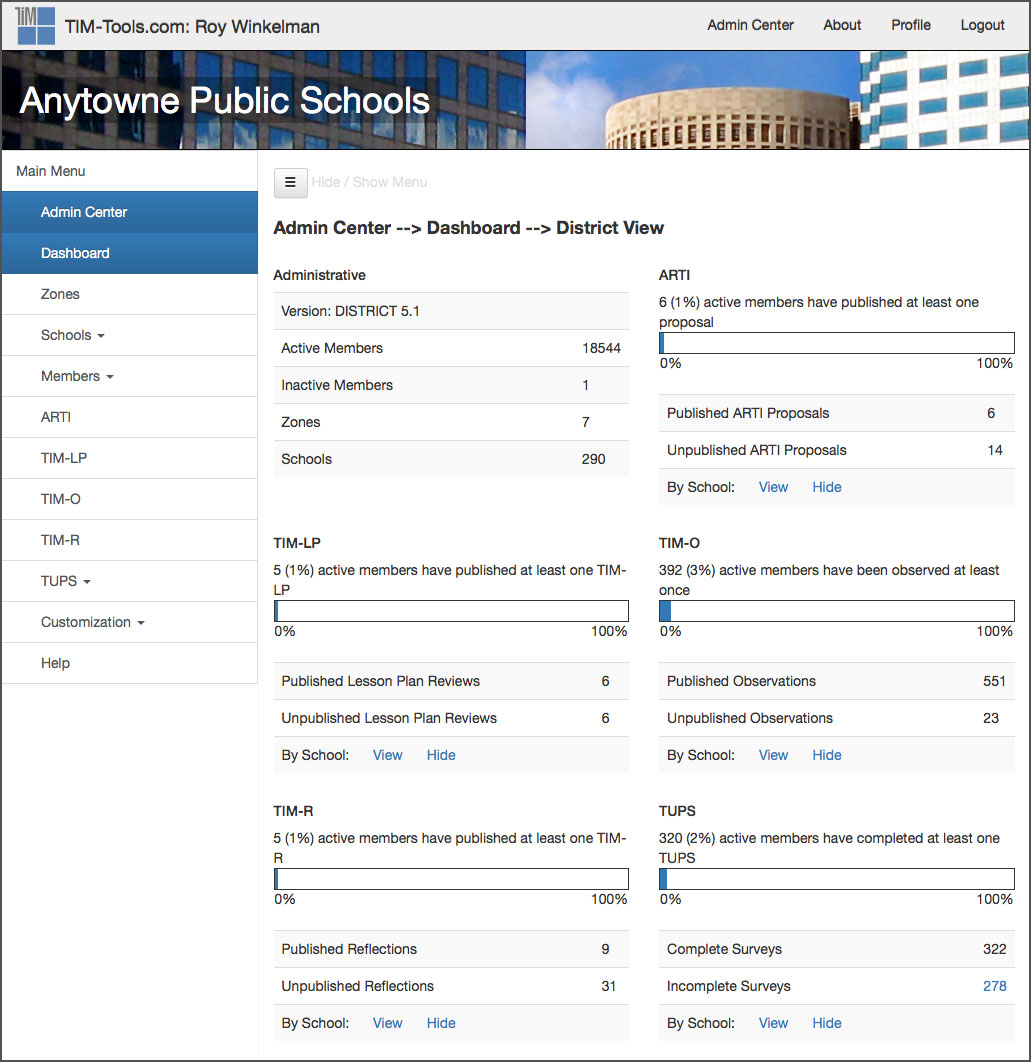
Figure 1: Dashboard. The Admin Center dashboard gives a high-level snapshot of general membership, schools, zones, administrators, and observers. It also shows total activity of each of the five tools.
NOTE: Your school or district’s name will appear in the banner on each page where you see the words “Anytowne Public Schools” in the screenshots.

Figure 2: Zones Panel. The zones panel allows a district to group schools into zones. This may be done to parallel administrative divisions of larger districts or to group schools for grant or research purposes.

Figure 3: Schools Panel. The schools panel has three sections. One is a complete list of schools. Here an administrator can edit the school name or identifier, assign the school to a zone, or generate a PDF report of TIM Tools activity at the school. The other two sections allow the uploading of schools by spreadsheet and the manual addition of one school at a time.
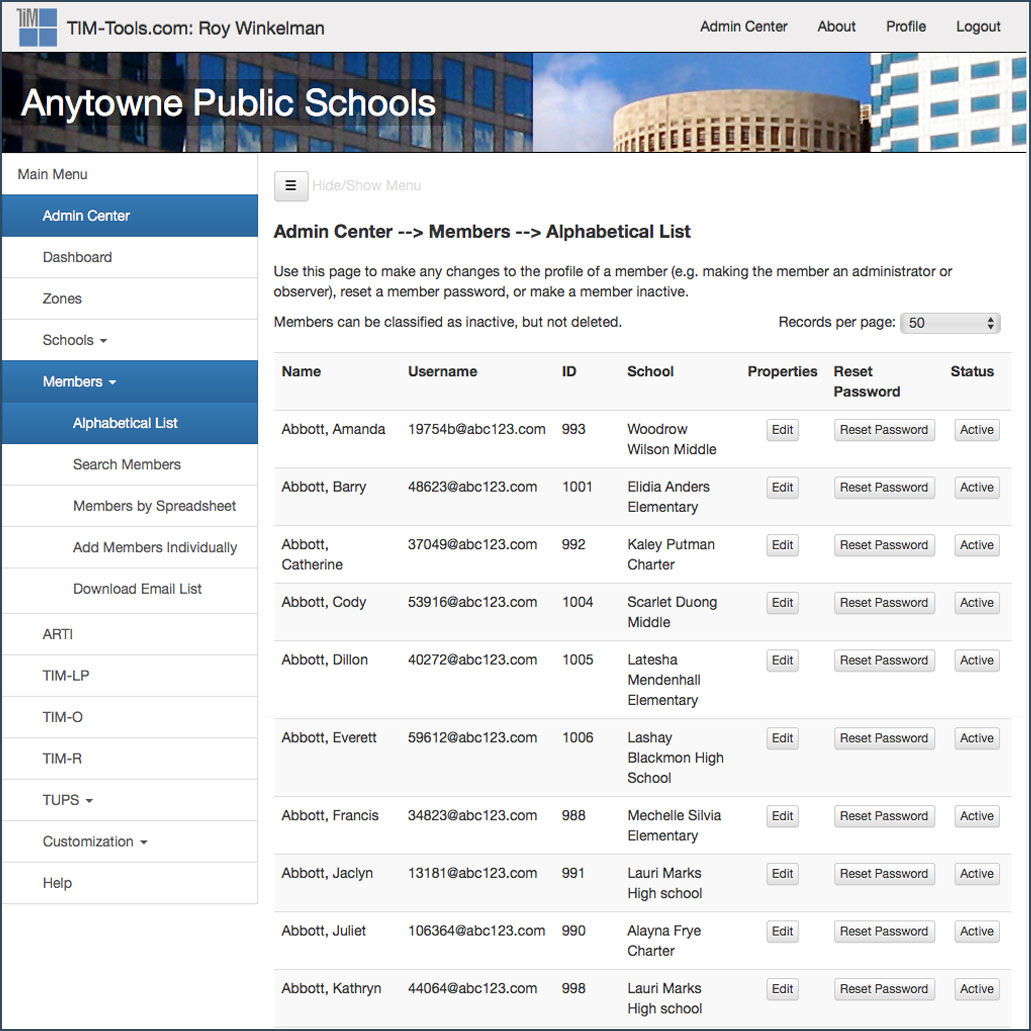
Figure 4: Members Panel. All persons, whether teachers, observers, or administrators, are “members” in the system The five sections of this panel provide for the manual editing of members, a member search, the uploading of members by spreadsheet, the manual addition of members, and the downloading of a complete list of members’ email addresses.
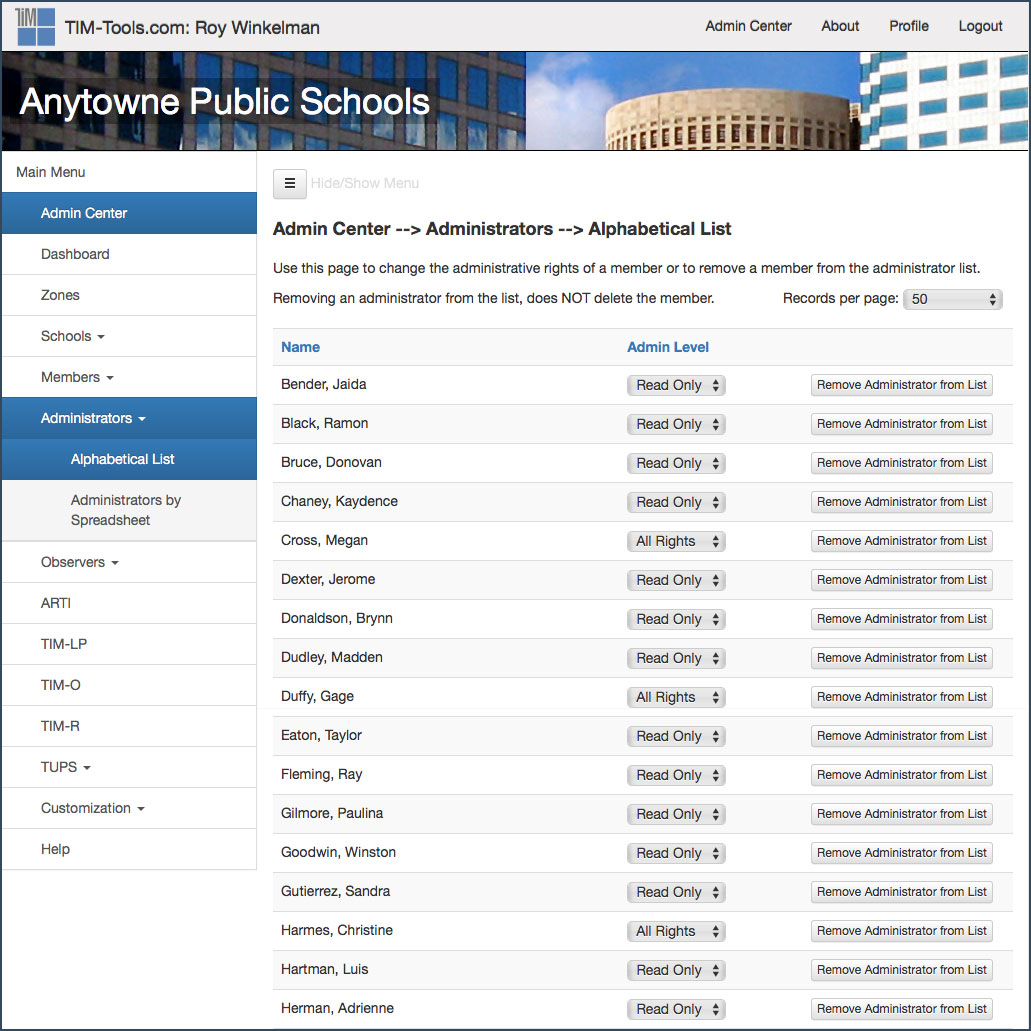
Figure 5: Administrators Panel. The administrators panel has two sections. The first section allows the assignment of administrator rights. The second section allows for the uploading of administrators by spreadsheet.
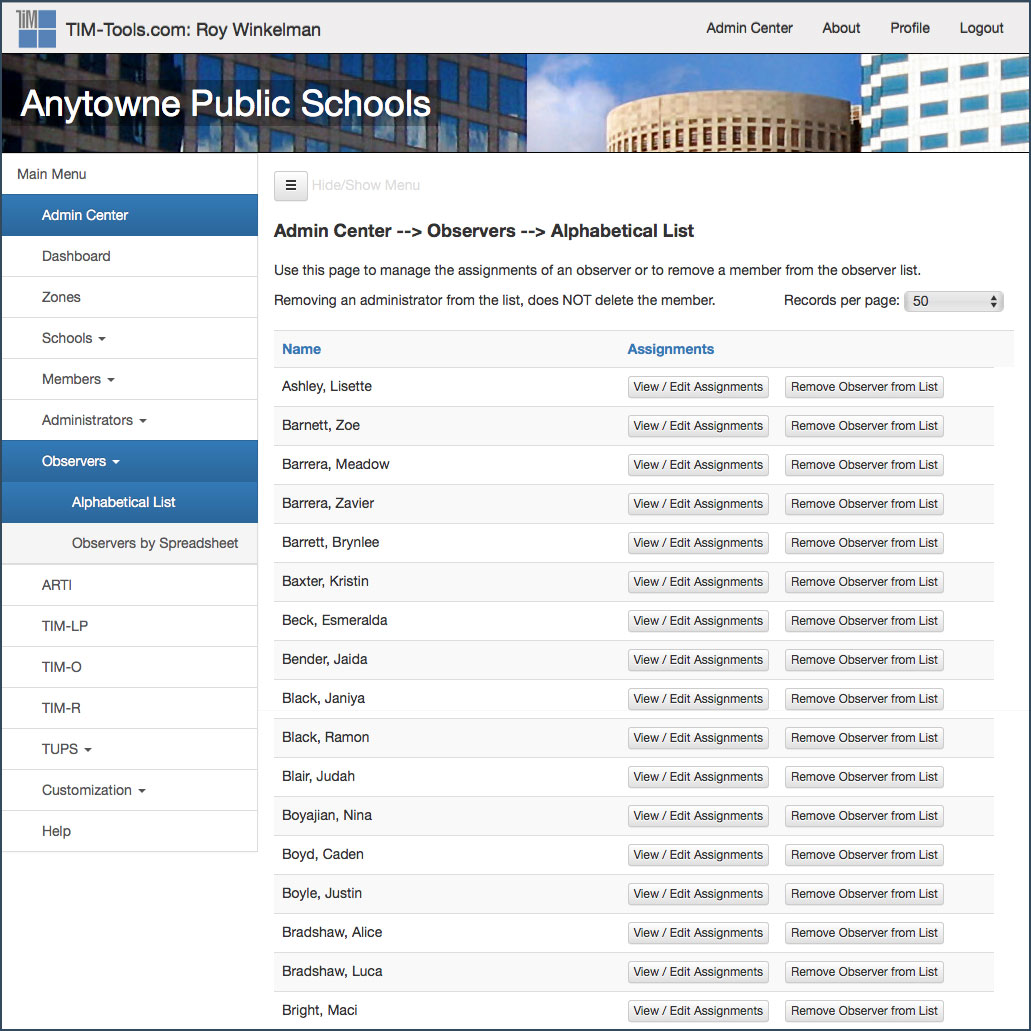
Figure 6: Observers Panel. The observers panel also has two sections. The first section allows for the assignment of individual observers to any combination of schools and zones desired. The second section allows for the uploading of observers by spreadsheet.
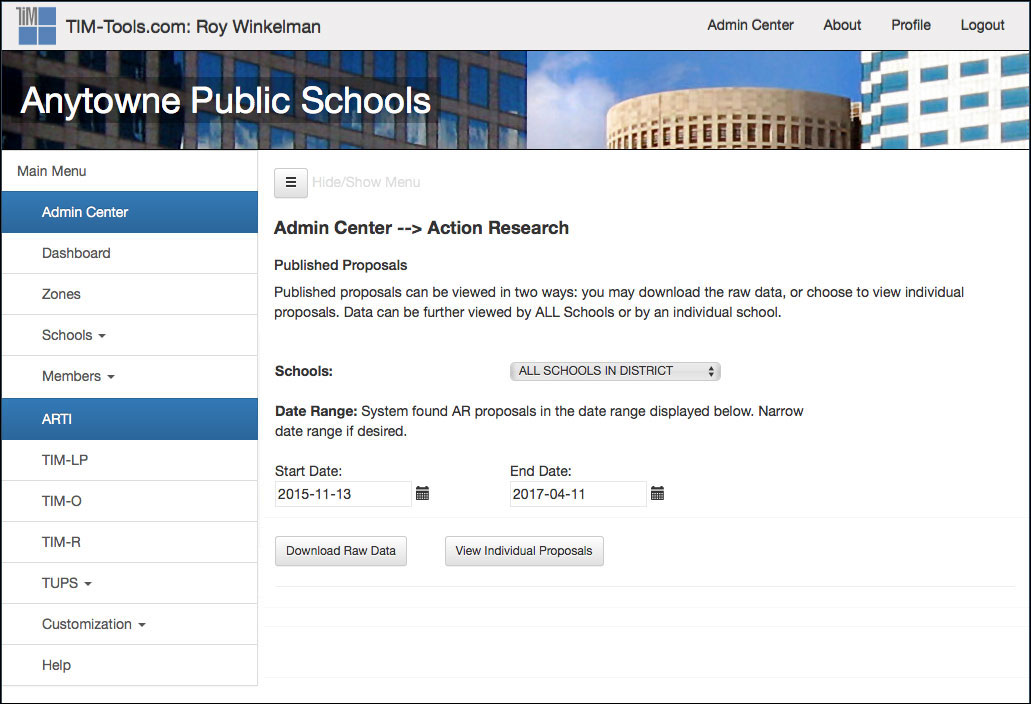
Figure 7: ARTI Panel. The action research panel allows an administrator to view all ARTI proposals or to sort and view by school.
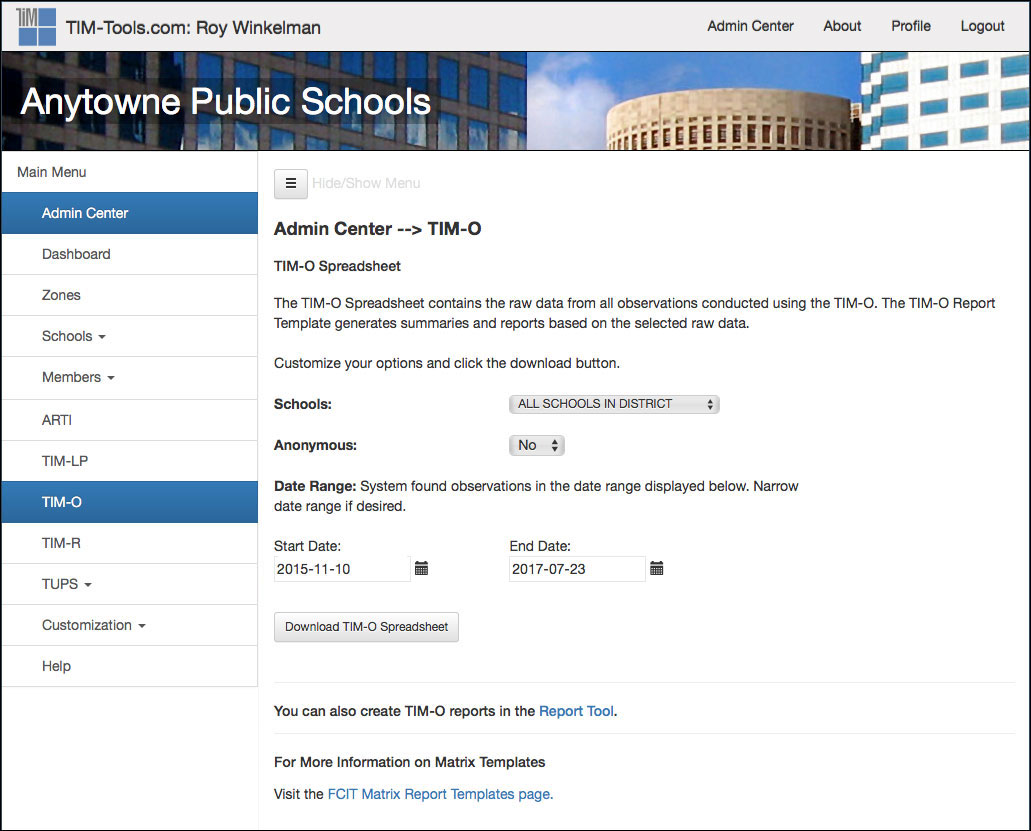
Figure 8: TIM-O Panel. The TIM-O panel allows the download of all raw TIM-O data by school or by district for a given date range. There is also an option to anonymize the data if desired. The dowloaded raw data can be imported into your preferred statistics software such as SAS or SPSS. Most districts, however, import the data into our custom TIM Tools report templates, which generate extremely useful reports automatically. The TIM-LP and the TIM-R panels work in exactly the same way.
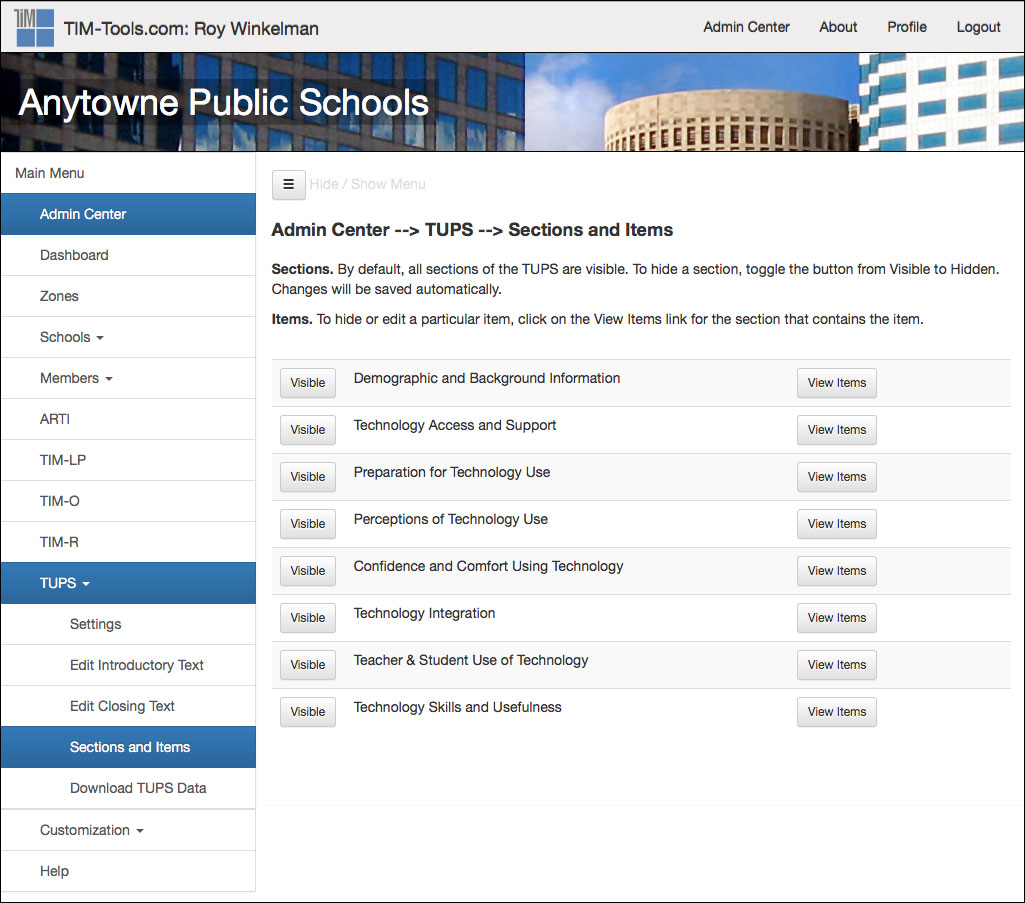
Figure 9: TUPS Panel. There are five sections to the TUPS panel including a control for the maximum number of times an individual can take the TUPS, fields to edit both the welcome and the exit text, a download area for raw TUPS data, and an area that allows for the complete customization of the survey. Any section can be turned on or off, any individual question can be turned on or off, and any question can be edited as desired.

Figure 10: Home Page & Application Customization. The default home page welcome message and image can be completely customized. Additional home page modules linking to the TIM, FCIT digital content, and iTeach may be turned on or off as desired. The Active Applications panel can be used to hide or show any combination of the seven tools within the TIM Tools suite.
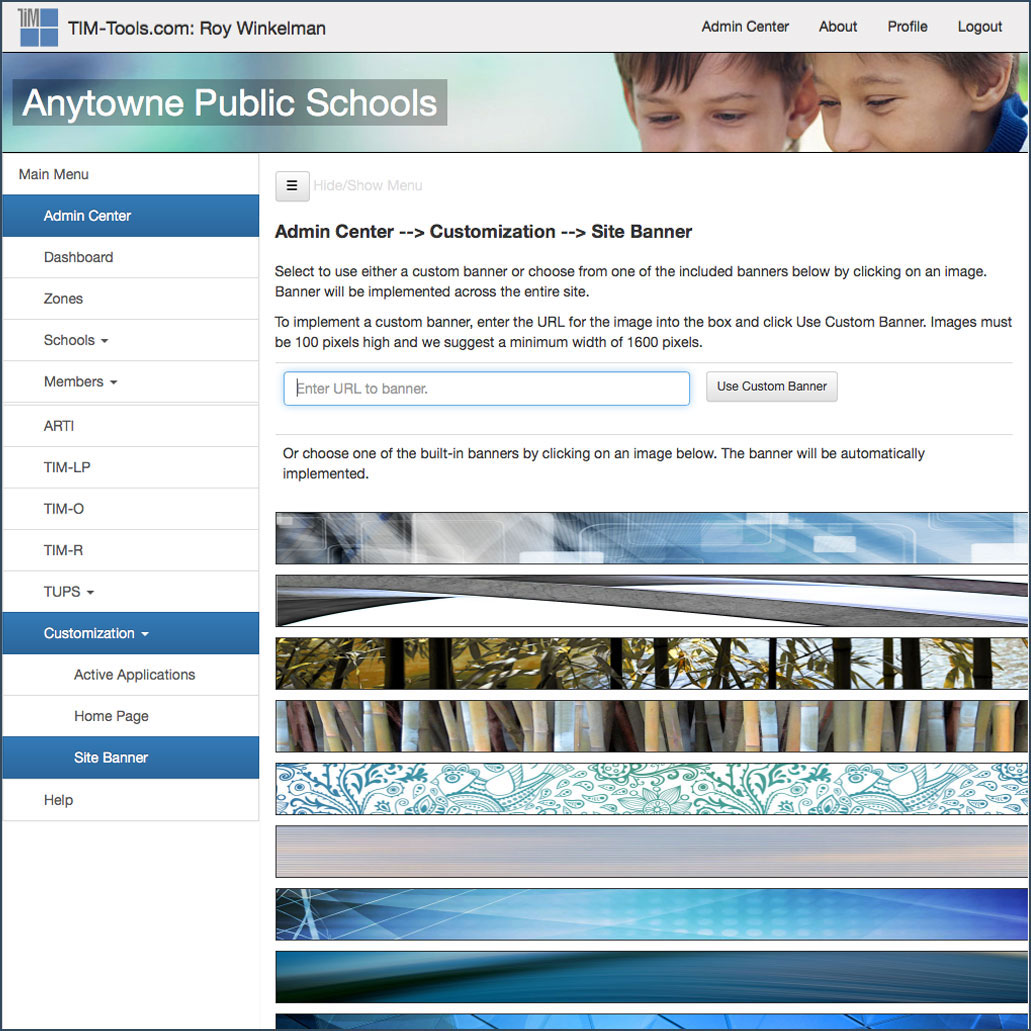
Figure 11: Site Banner Selection. The Site Banner customization panel allows an administrator to select a banner image from our collection of over 100 photos and illustrations. Some districts keep the same banner throughout the year. Others prefer to change the banner frequently.
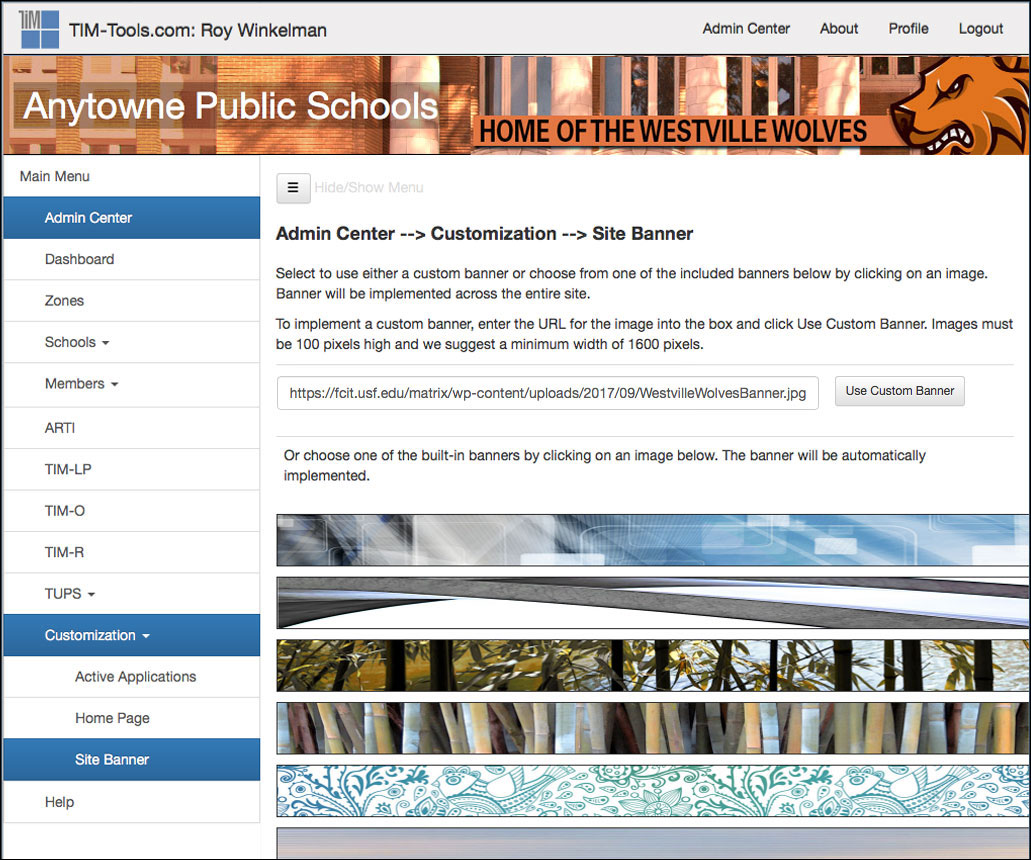
Figure 12: Custom Banner. A district can also link to a custom banner if desired. This allows a district to maintain a common visual identity across their public website and their TIM Tools instance.